When you click on this post we believe you are trying to figure out how to add fields to your forms so that users submit all the necessary information in a clear order. Hence there’s a way out which makes us write this article.
So if you want to allow users to add fields to your form. In this next section, I’ll show a step-by-step guide to how you can let users add repeating sections in Gravity Forms.
Table of contents:
What is a Repeater Field in Gravity Forms?
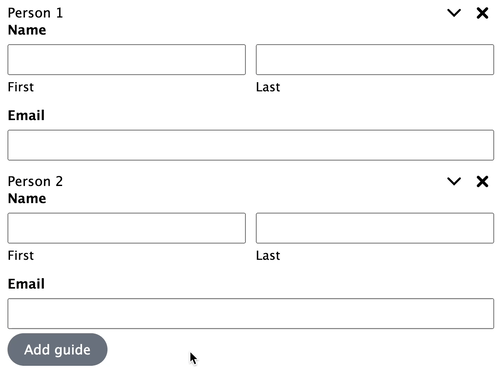
Gravity Form repeater fields enable you to create one or more sets of fields that can be repeated. This allows users can quickly add numerous pieces of data by clicking on the “Add” button and removing them by the X button.
Why you should build repeatable blocks to your forms?
There are instances in which you don’t know how many fields the user needs to fill out in the form. As a result, by allowing users to add fields to your forms, you may make the form more adaptable for various use cases.
For example, they want to add extra fields for people to write comments or indicate designs, colors, sizes, and other details about their uniform order. This ensures that you receive all of the information required to properly complete an order.
You should notice that the flexibility and functionality of the form on your website can be improved with the Gravity Forms Repeater Field to provide a great user experience. Because users are given the freedom to add the relevant elements on their own. It aids in the production of clear and engaging forms that do not leave out any important information from users.
How to Create a WPForm with Repeatable Fields?
Step 1: Select the Best WordPress Plugin
We recommend using Gravity Forms Repeater Fields by Add-ons.org to build a repeater field in your forms, as shown in this tutorial. With it, you can easily add repeater fields to the forms on your WordPress site.
Step 2: Install and Activate Plugin
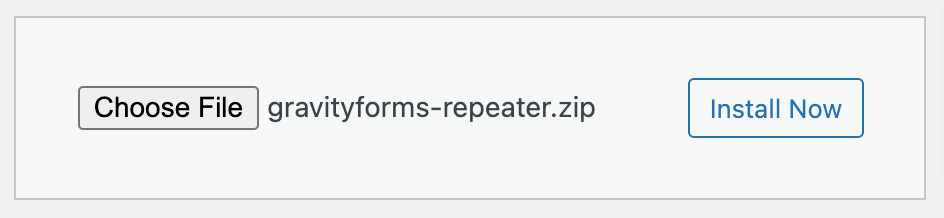
After downloading the plugin, it’ll be saved as ZIP files on your device.
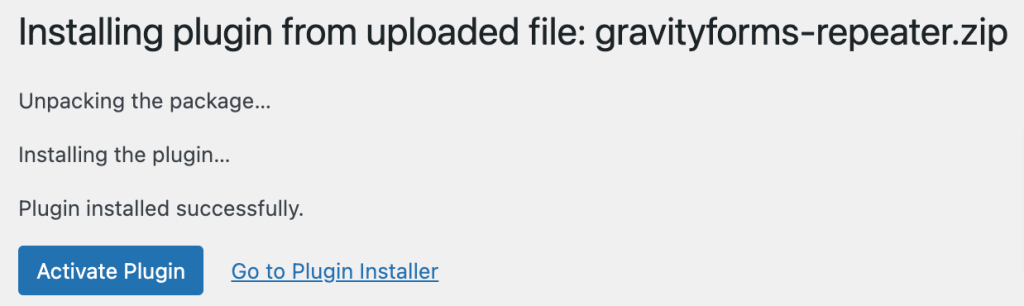
Installing WPForms is easy and similar to installing any other WordPress plugin. Now, go back to the WordPress dashboard and open Plugins >> Add New – Upload Plugin and choose the ZIP files, then install and activate it.
Step 3: Establish a Gravity Forms with Repeating Parts.
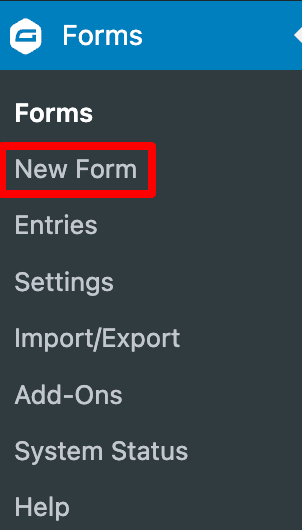
To create a new form, click on Forms from the left sidebar of the WordPress dashboard.
Now click on the Add a New Form button.
You will see the window, let’s start with a New Blank Form.
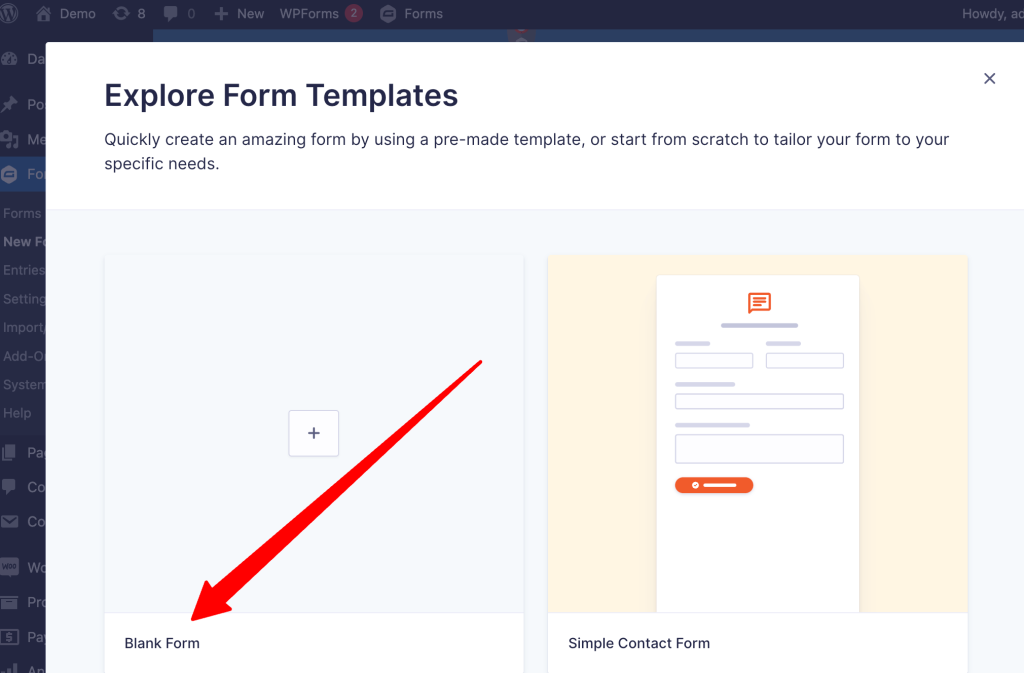
Click Blank Form, and a new page appears, you need to add form title then on your screen that looks something like given below. It’s the interface of Gravity Forms.
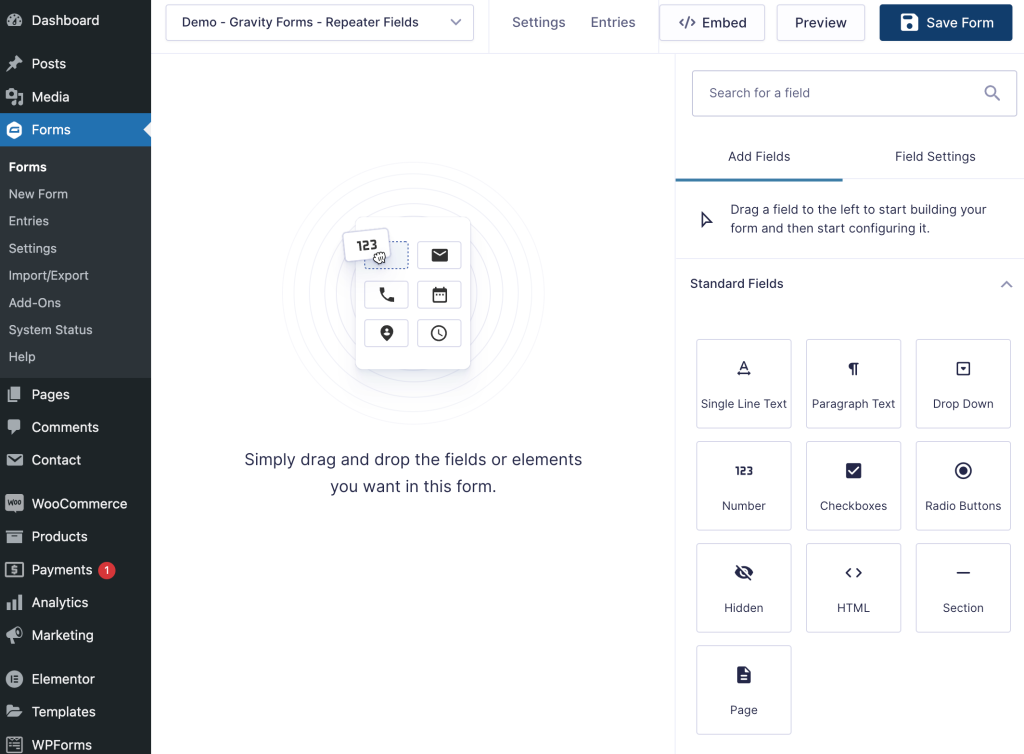
On the right side are all the form fields available for use and their field options. On the left side is where you build the form by adding rows and placing fields in them. All you have to do is drag the fields from the right into the rows.
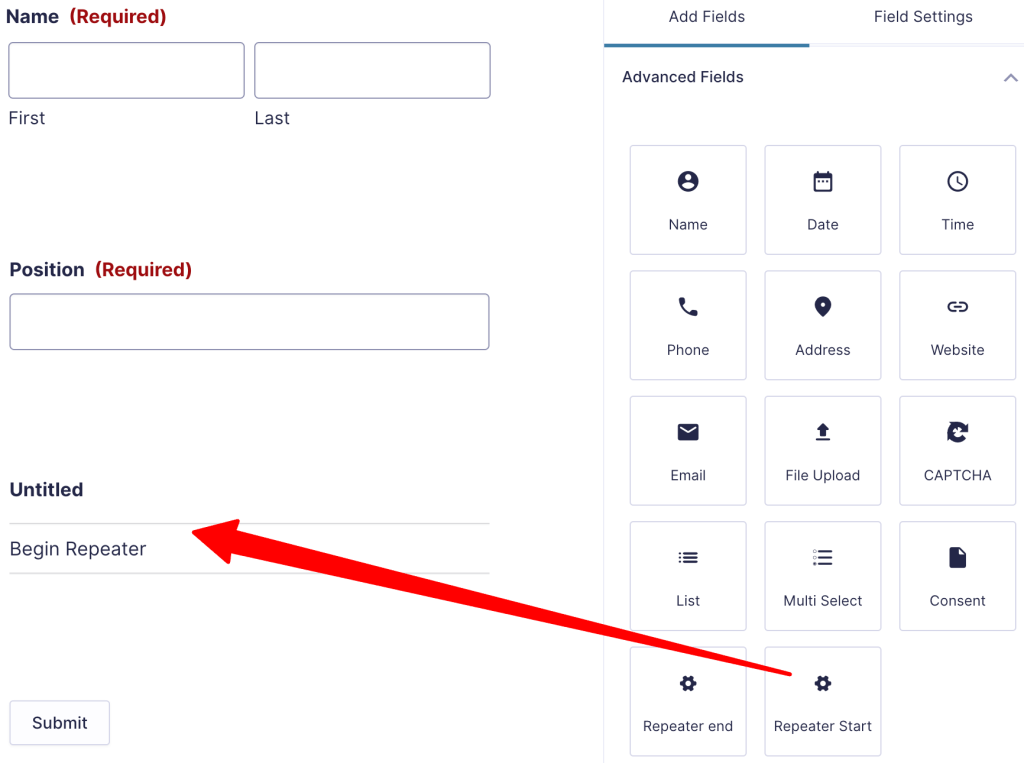
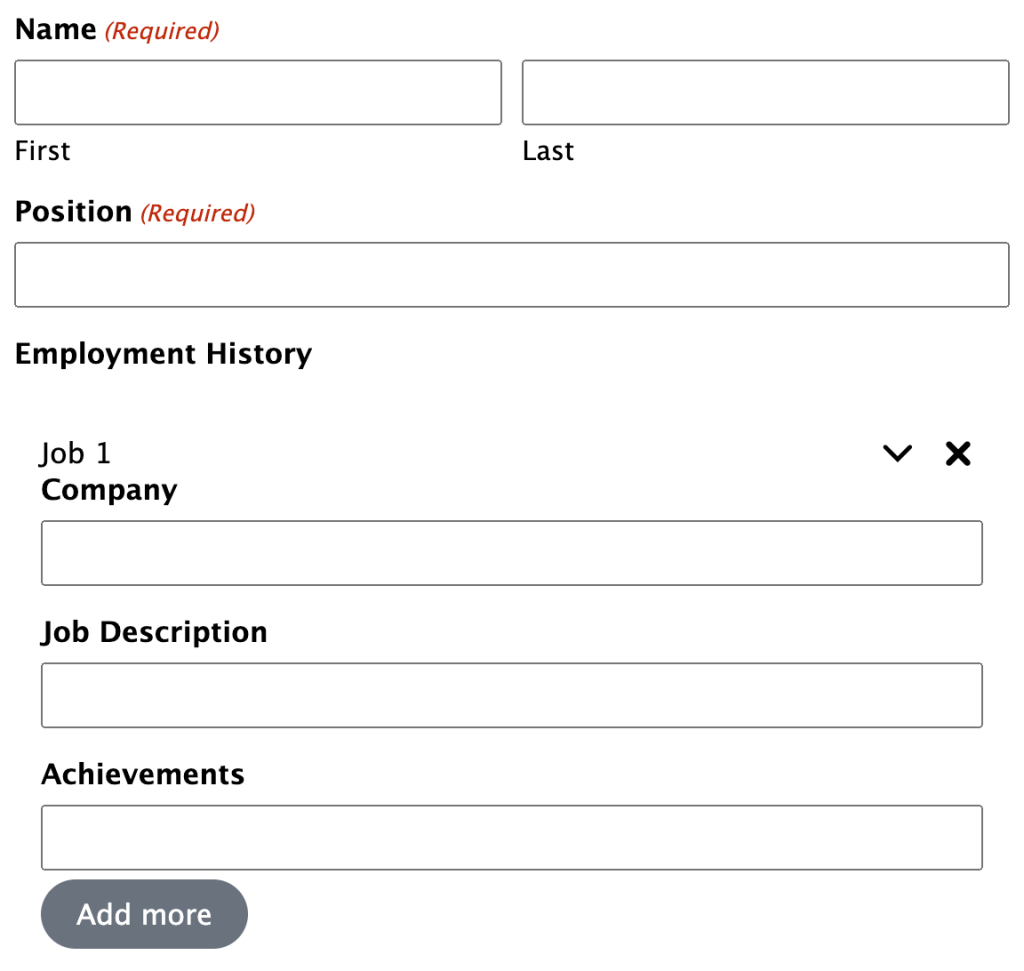
Let’s create an Employment History form where we will let applicants add fields to include their rich experience in the past.
First, we add Name Fields and a Single Line Text for Position Fields.

Click on the Field Settings. You can customize the label, placeholder, CSS class, and size… You can also make any field required so that a user can not submit the form unless filling up that required field.
Click on the Start Repeat from the Add Fields tab to add it to your form.
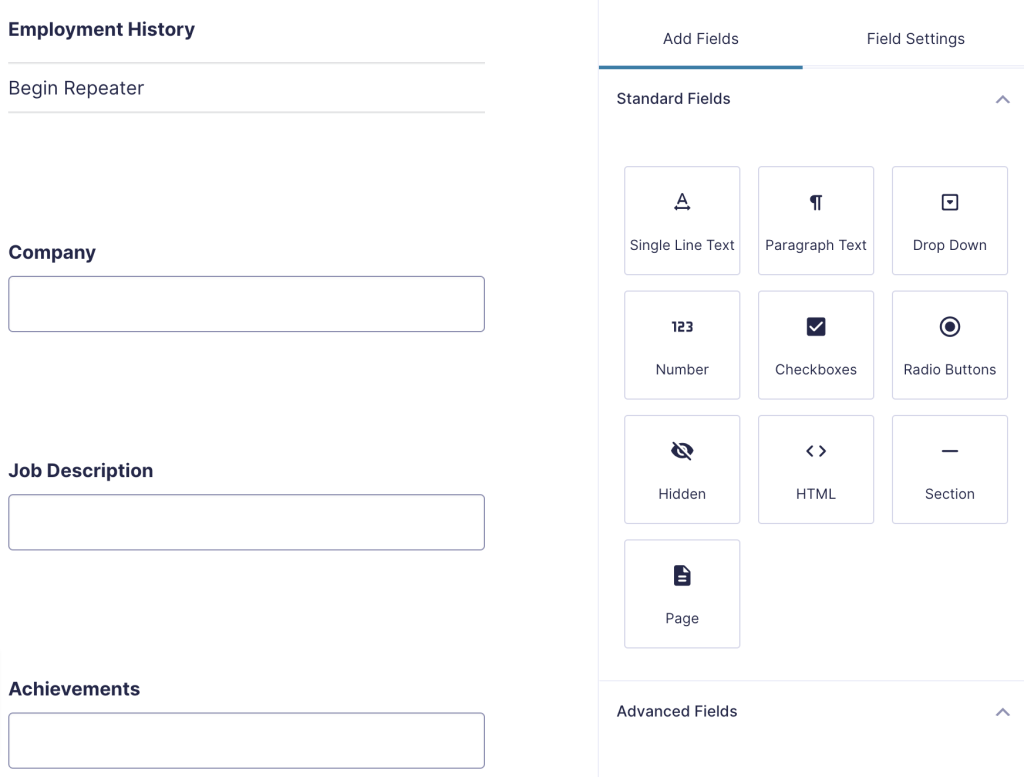
Open the Field Settings, and change the Label to Employment History.
Then add three Single Line Text, change the Lable to Company, Job Description, and Achievements like below:
Click on the End Repeat from the Add Fields tab to finish repeatable blocks. And click on Save when you’re done. You can view what the form looks like in the front end with the Preview feature.

Step 4: Customize and Configure Form Settings
After adding Repeater fields, it’s time to customize the form fields for the Repeater Rows.
Simply click on Start Repeater, and you will see the properties:
Label: Title field users see when filling out the form
Title: An optional title before each row of the repeater
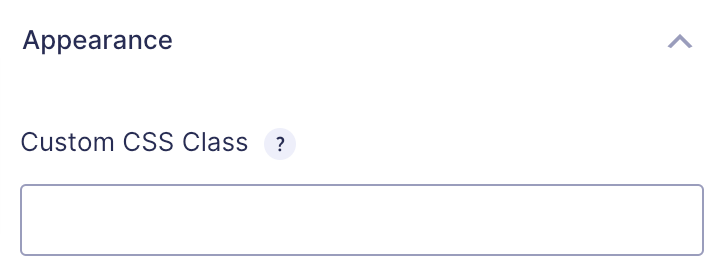
Custom CSS Class: Enter the CSS class name you would like to use in order to override the default styles for this field.

Simply click on End Repeater, and you will see the properties:
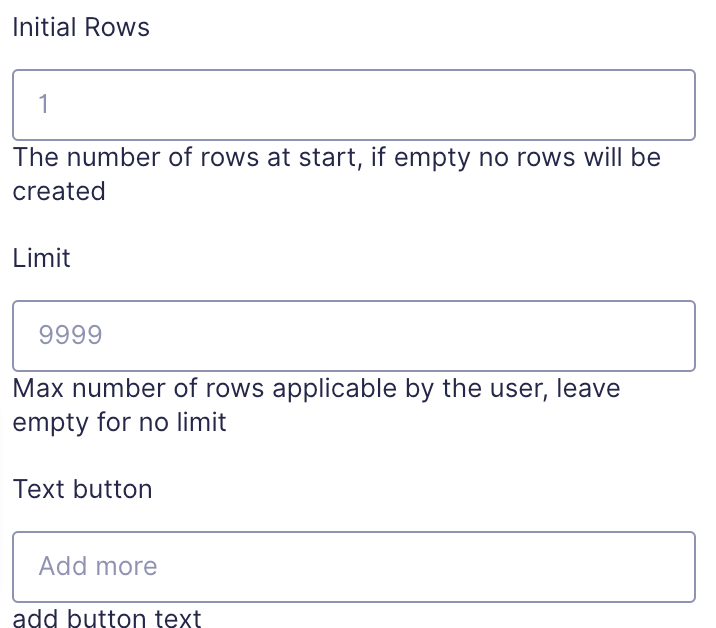
Add button text: You can change the text of the “Add” button.
Initial row: You can set the number of repeater fields shown first.
Limit: Max number of rows applicable by the user, leave empty for no limit.
Field Size: Select the default form field size
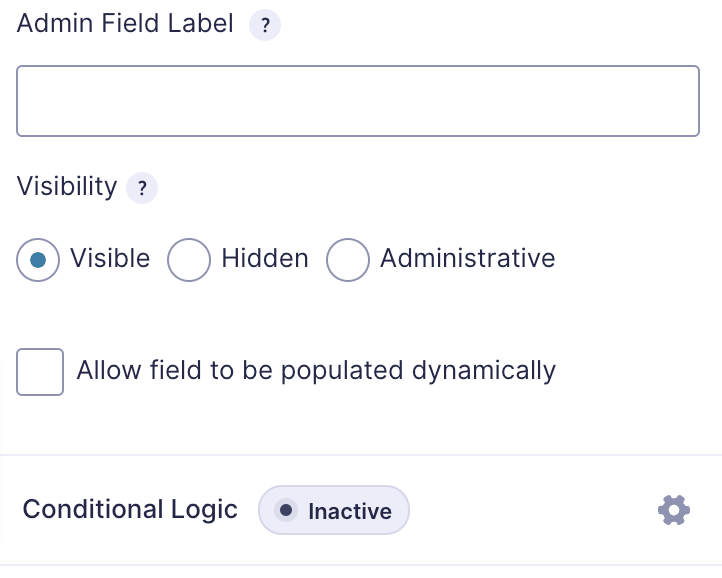
Admin Field Label: Entering a value in this field will override the Field Label when displayed in the Gravity Forms administration tool.
Visibility: Select the visibility for this field.
Conditional logic: allows you to change what the user sees depending on the fields they select.

Additionally, for the overall settings of the Gravity Forms, navigate to Settings >> General. From here, you can change the form name, and description, form layout, restriction, and so on.
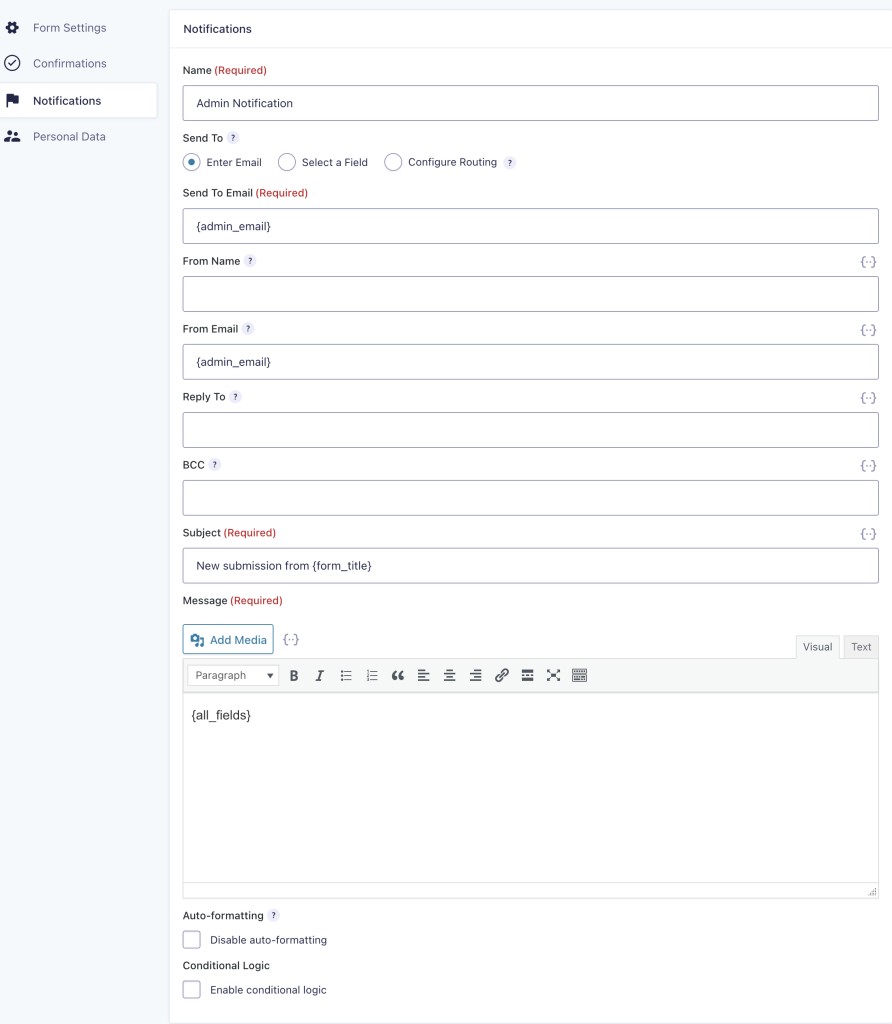
In a similar way, you can go to Settings >> Email to configure your email notifications. From here, you can easily set the to and from email addresses for the delivery of the email. You can even enable conditional logic if you want.
You can discover more by choosing Confirmations, Personal Data.
Step 5: Save and Preview
After completing all of the previous steps, you click on Save and Preview to look at how your form appears from the front end.
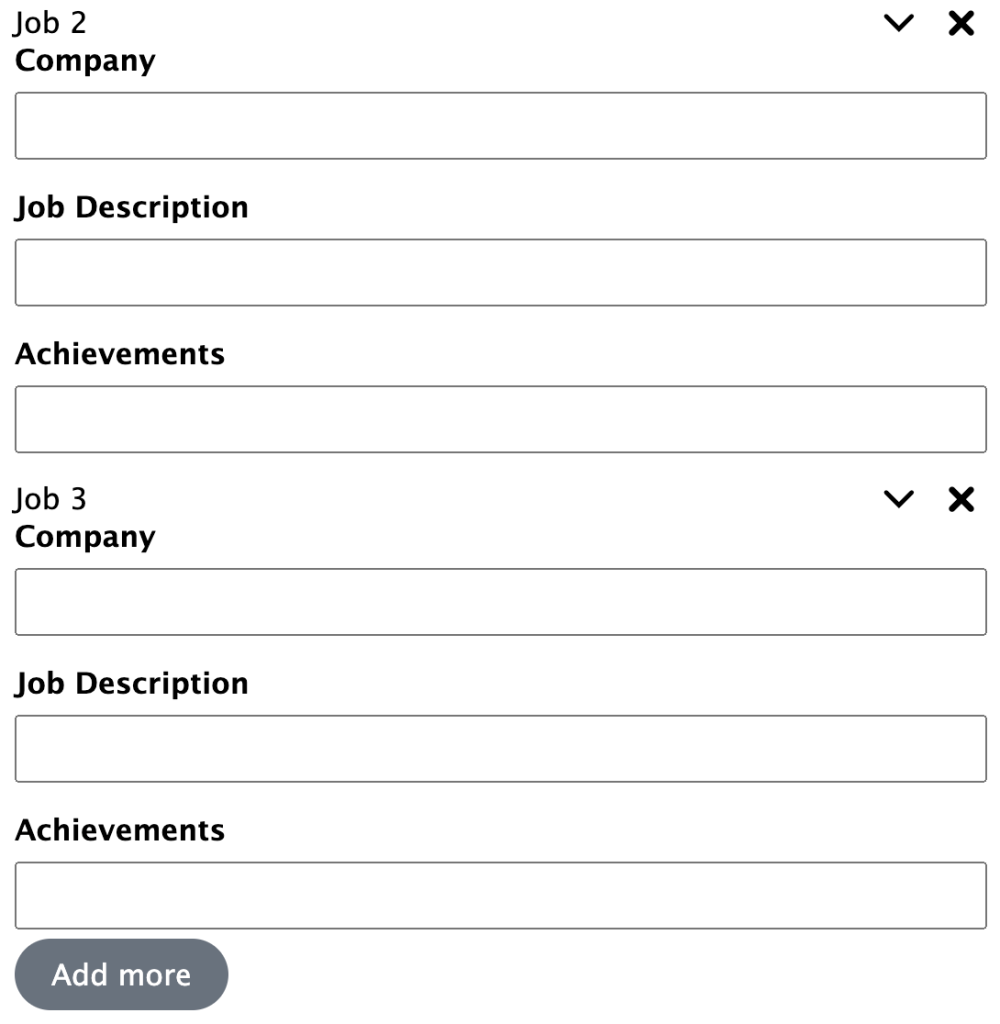
When the user wants to add more data, they can simply click on the ADD button and submit the form. Besides, they can also remove the repeater fields using the X button if they don’t want to add the data.
Step 6: Publish your form
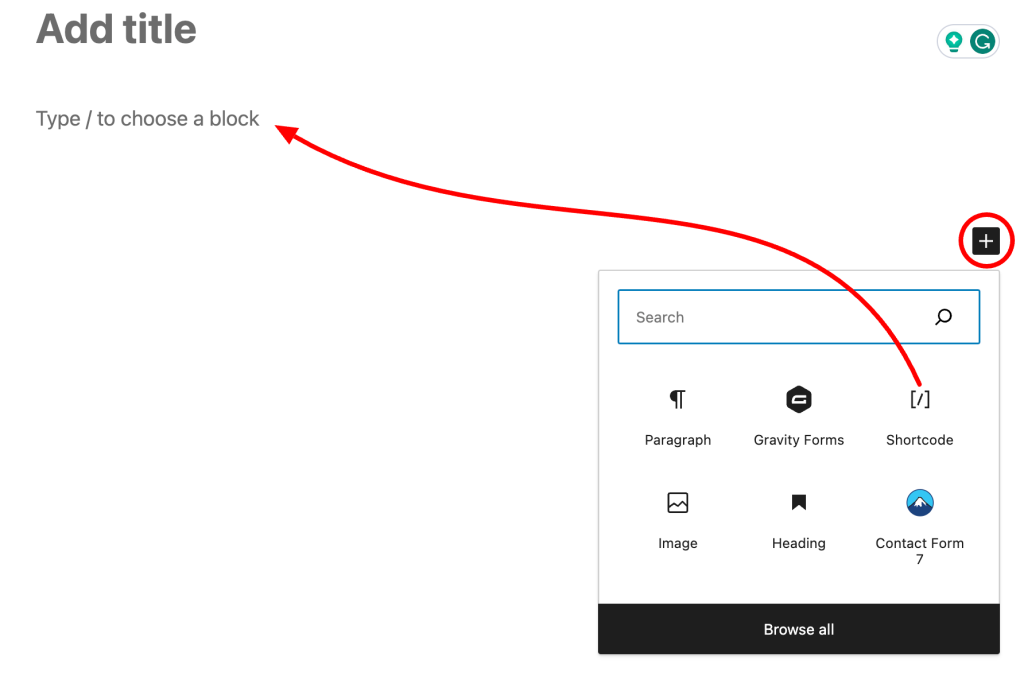
In the left sidebar of the WordPress dashboard, click Add New under Pages. A new window appears like below:
You set the page title and click the plus (+) sign. In the search box, write Shortcode and select it from the menu.
Copy the form shortcode from the top of the form builder
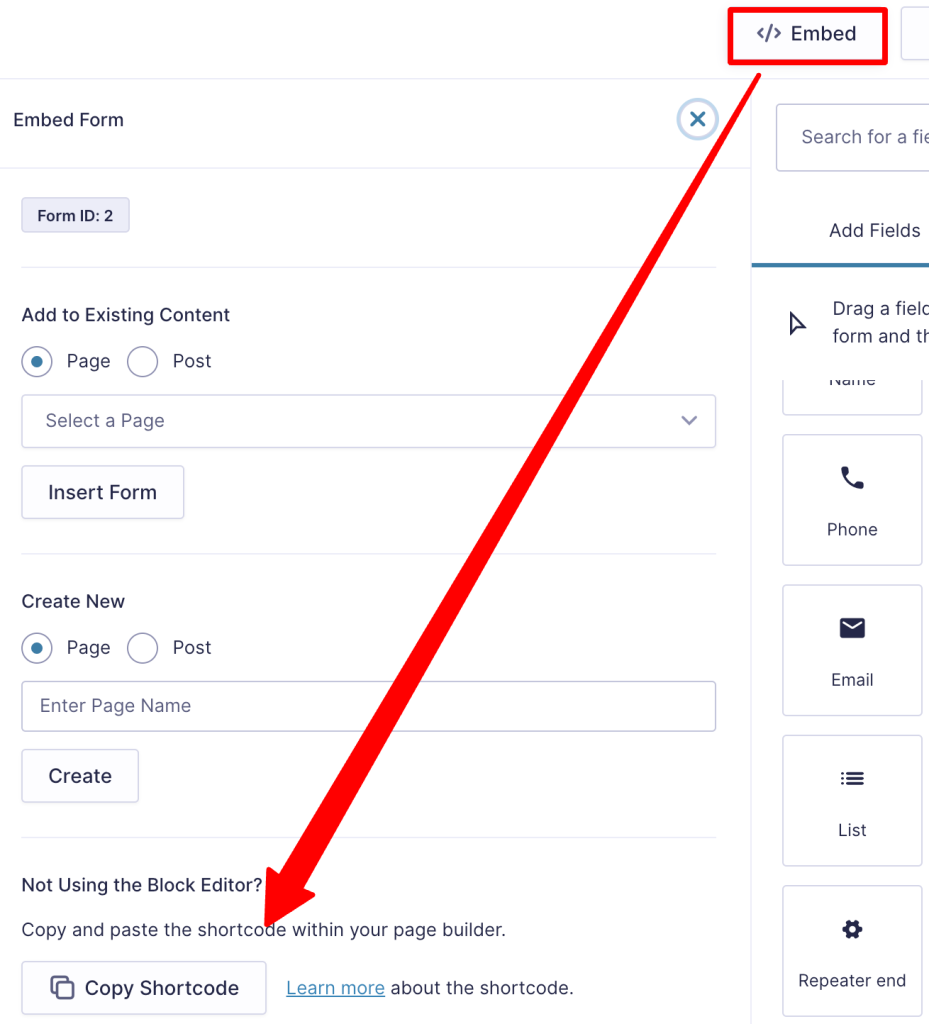
Paste the shortcode you copied here and click Publish.

You’re done! Your form with the gravity repeater field is now live on your website.
Video demo
Wrapping up
In this article, we tried to give you a detailed guide on how you can allow users to add fields to your WordPress form. So don’t forget to install the Gravity Forms Repeater Fields plugin to make it easier than ever to create custom forms with repeater fields to place on your site.