If you’re interested in learning how to limit or restrict dates for your users by choosing date ranges, read on. This is the perfect article for you.
Table of contents:
What are restrict dates?
Restricted dates refer to specific dates or date ranges that are limited or restricted from selection or access in a particular context. These restrictions can be applied in various scenarios, such as in forms, booking systems, event scheduling, age verification, and more.

In the context of forms or user interfaces, restricting dates means setting certain rules or limitations on the dates that users can choose or interact with. This can include:
- Minimum Date: Setting a minimum date restricts users from selecting any date prior to the specified minimum date. For example, if the minimum date is set to today’s date, users will not be able to choose a date in the past.
- Maximum Date: Setting a maximum date restricts users from selecting any date beyond the specified maximum date. This can be useful when you want to limit the date selection to a certain range or prevent users from choosing dates too far in the future.
- Date Range: In some cases, you may want to restrict date selection to a specific range. For example, if you have a booking system, you might allow users to select dates only within a certain period, such as within the next 30 days.
- Exceptions: Exceptions provide the ability to exclude certain dates from the available selection range. For example, you might want to exclude holidays, specific blackout dates, or any other dates that are not suitable for selection. By specifying exceptions, you can restrict users from choosing those specific dates.
- Day of the Week Restrictions: Day of the week restrictions allow you to control which days of the week are available for selection. This can be useful in scenarios where you want to limit users to specific days, such as scheduling appointments only on weekdays or allowing bookings on weekends only.
These date restrictions can help ensure data accuracy, prevent invalid or inappropriate selections, and align with specific requirements or business rules in various applications and systems. Creating a restrict date as soon as possible.
Why you should use restrict dates ?
Date restrictions in Elementor forms offer a wide range of practical use cases to enhance user input control and streamline data collection. Here are some common scenarios where date restrictions can be applied:
- Booking and Reservations: If you have a booking or reservation system on your website, you can use date restrictions to limit the available dates for bookings. For example, you can restrict users from selecting past dates or allow booking only within a specific range, such as within the next 30 days.
- Events and Appointments: When scheduling events or appointments, you can impose date restrictions to ensure users can only select available dates. This prevents conflicts and double-bookings by limiting the options to dates when the event or appointment is actually available.
- Subscription Expiration: For subscription-based services, you can set date restrictions to allow users to select a subscription duration within a specific range. This ensures they choose a valid subscription period and prevents them from selecting dates outside the available subscription range.
- Surveys and Forms: Date restrictions can be useful in surveys and forms where you want to collect specific data within a given timeframe. For instance, you can limit the date range for a survey response or restrict the availability of a form for a limited period, such as during a promotional campaign.
Getting Started
Step 1: Install the Plugin
Once you’ve chosen a plugin, you’ll need to install it on your website. Log into your WordPress admin dashboard. Navigate to the “Plugins” section and click on “Add New.” Search for the plugin by name and click “Install Now” once you find it.
Step 2: After installation, click on “Activate” to activate the plugin.
How to add restricted date fields?
- Step 1: Edit Your Form: Begin by creating a new form or opening the page or post where you want to add the form in Elementor. Edit the page using Elementor’s visual editor.

- Step 2: Add a Date Field: Drag and drop the Form widget onto the desired section of your page.
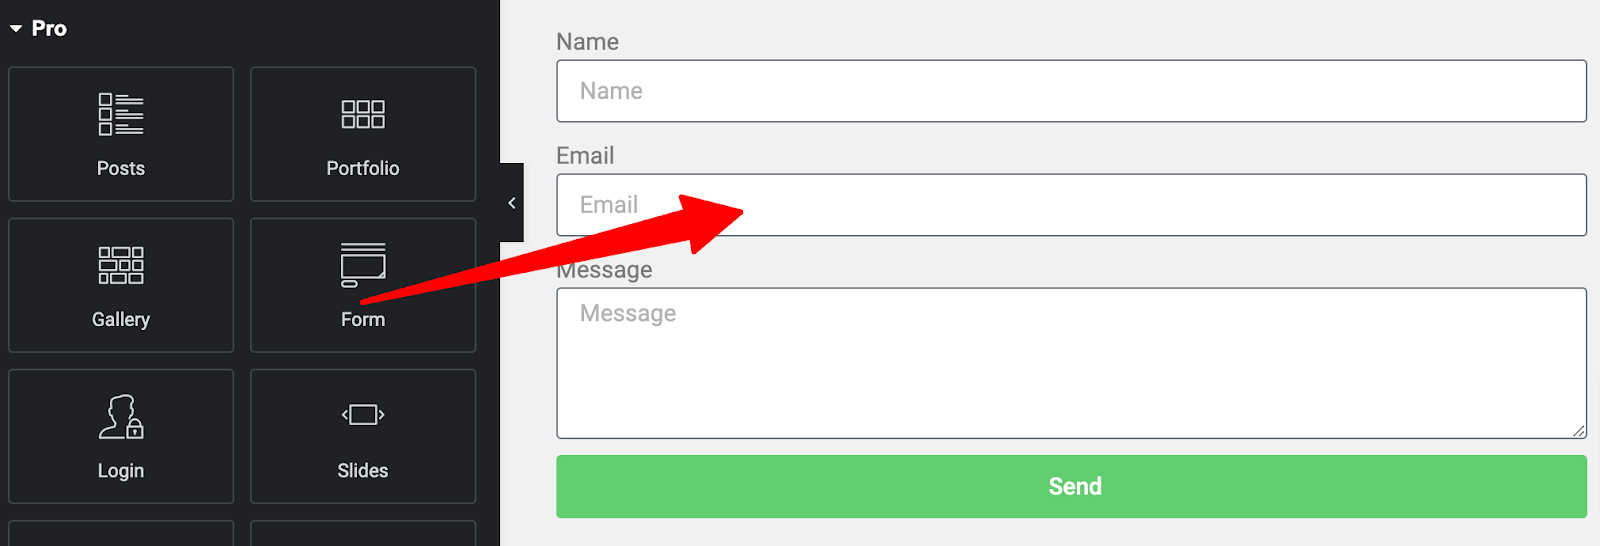
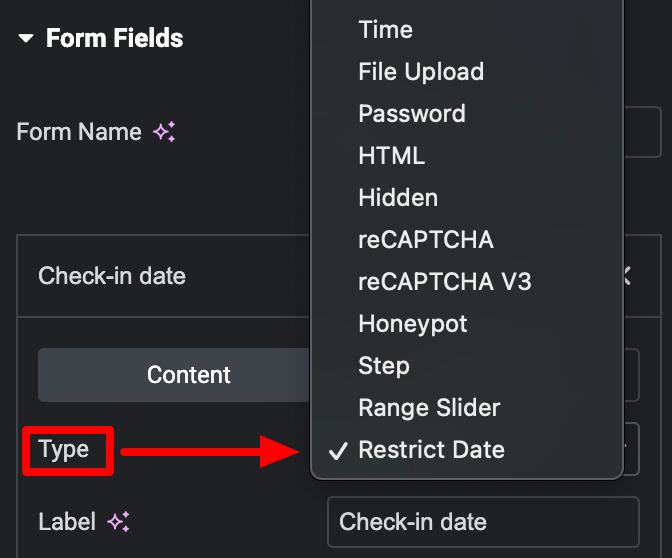
- Step 3: Select Restrict Date Type: In the form field selection window, use the search bar to find the “Restrict Date” type. Click on it to add them to your form.
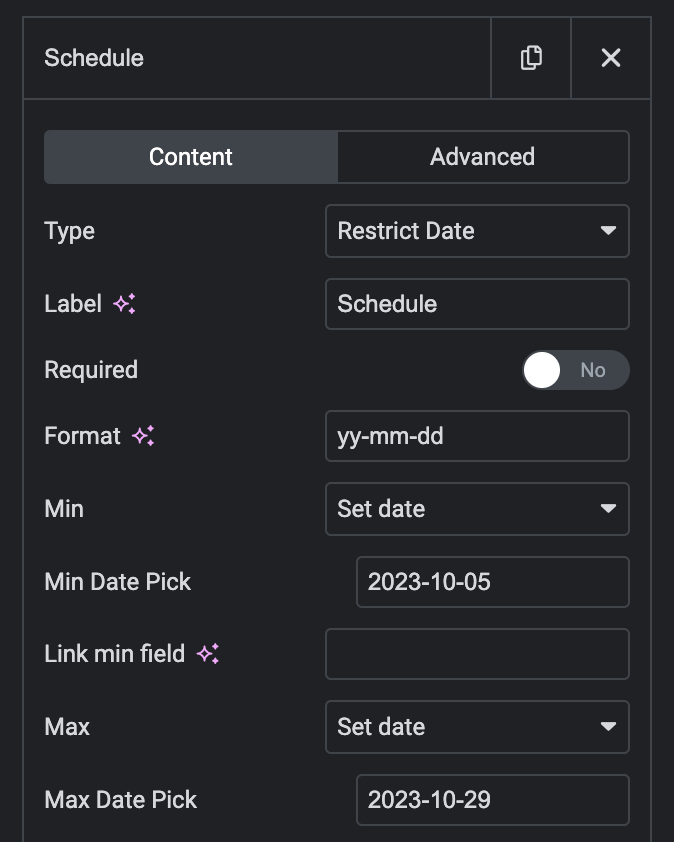
- Step 4: Set Minimum and Maximum Dates: Look for the “Min Date” and “Max Date” options within the Field Options. These settings allow you to define the minimum and maximum allowable dates for user selection.
There are 3 types:
+ None: There will be no date limit for selection. Users can select past, present, and future dates
+ Current date: it means that you want to restrict users from selecting a date before the current date.
+ Set date: you can choose any dates as minimum and maximum date
How to set specified range days?
This allows users to select a start date and an end date within a specified range.
Step 1: Find Min/Max options to configure the minimum and maximum number of days for the range.
- Specify the minimum number of days that a user can select as the start date.
- Specify the maximum number of days that a user can select as the end date.
If you choose Set date, click on Min/Max date pick to show the date table for settings.
Step 2: For example, at the Schedule field, we set min date is 2023 Oct 5th and max date is 2023 Oct 29th.
Step 3: See a preview: Any date between the ranges can be chosen.

How to link two date pickers?
To link two date pickers, where the selection in one date picker affects the available options in the other, you can follow these steps:
Let’s say you have two date pickers: “Check-in Date” and “Check-out Date”. The goal is to restrict the available options in the “Check-out Date” picker based on the selected “Check-in Date”.
- When a user selects a “Check-in Date”, the “Check-out Date” picker should only allow dates on or after the selected “Check-in Date”.
- If the user changes the “Check-in Date”, the options in the “Check-out Date” picker should update accordingly.
Step 1: Add two Date fields for the “Check-in Date” and “Check-out Date”. Set Min and Max date sequentially.


Step 2:
Locate Check-in – Advanced
Copy ID and paste to Link Min Field of Check-out.


Locate Check-out – Advanced
Copy ID and paste to Link Max Field of Check-in.


Step 3: Save and have a look.


How to add an exception?
Exceptions allow you to negate the date limitations established in the other settings. An exception works with both selectable dates and unselectable dates. If the excepted date is selectable, it will now be unselectable. If the excepted date is unselectable, it will now be selectable.
E.g:
If Oct 6th through Oct 16th are selected for the next appointment. But you would like to make allow a specific Oct 13th to be unselectable, you can add an “exception” for that 13th. Click the Add Exception button and select the desired date from the date picker.


Days of week
This setting allows you to restrict which dates are selectable based on the days of the week (e.g. Monday – Sunday).
By default, all days are allowed. Uncheck all days option to select specific days.

Wrapping up
Restrict dates add-on can improve the user experience and ensure that users select valid dates within your specified criteria. Whether it’s preventing users from selecting past dates, limiting future date selections, or defining a specific date range, this feature adds flexibility and control to your form design.