If your business accepts appointments, then it’s smart to create an online booking form. Simplify reservations and appointments with our intuitive interface. Begin making the booking form today!
Table of contents:
It can be a struggle to find a suitable booking plugin for you
Select a suitable WordPress plugin that offers appointment booking functionality. There are various options available, such as “Plugin A,” “Plugin B,” or “Plugin C.”…But if you look for features that align with your specific needs, such as customizable form fields, send email notifications to yourself and confirmations to them, calendar integration, or payment processing. This plugin that we deliver below is perfect for your needs.
It’s not a complex task to create the appointment booking form
Designing the appointment booking form you require for WordPress is an easy undertaking. Follow these three steps to accomplish it.
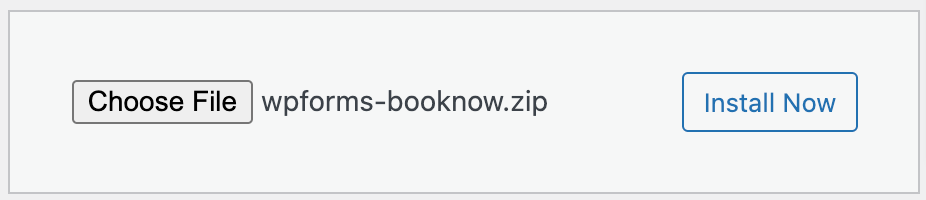
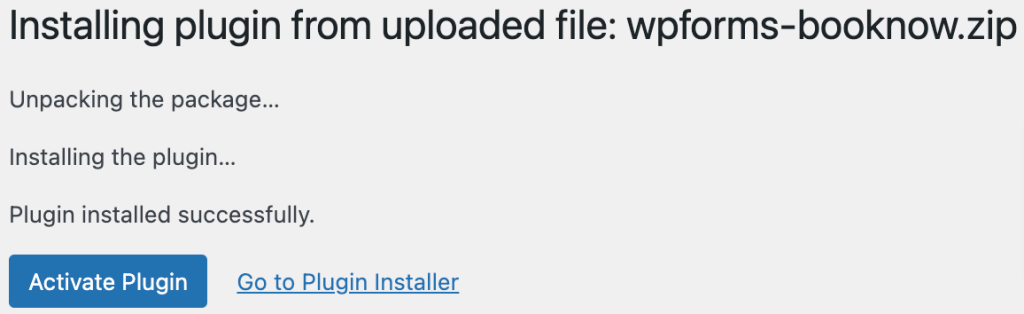
Step 1: Install and Activate the Plugin
Once you’ve downloaded the plugin, install and activate it on your WordPress website. You can do this by accessing the WordPress dashboard, navigating to the “Plugins” section, and clicking on “Add New.” Search for the plugin by name, install it, and then activate it.
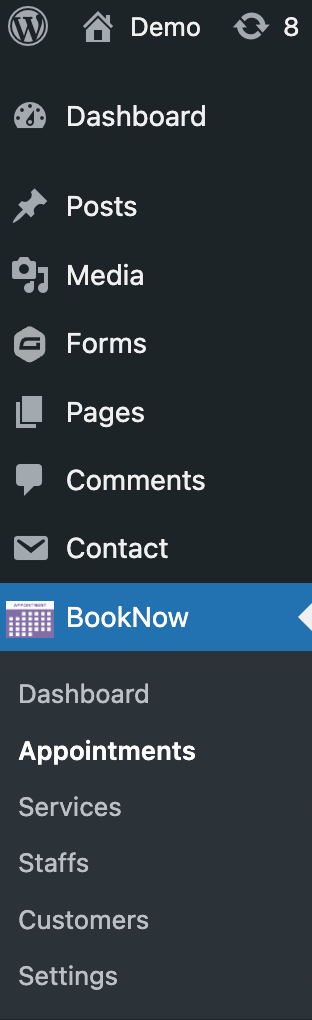
Step 2: Configure and Customize the Form
After activating the plugin, you’ll typically find a BookNow menu. Access it to set up your appointment booking form according to your preferences. Customize the form fields, add staff, add service, and adjust any other relevant settings as per your requirements.
Let’s customize the form:
Start with Settings:
Navigato BookNow – Click on Settings
You can change the form’s general information, working hours, holidays, and color here.
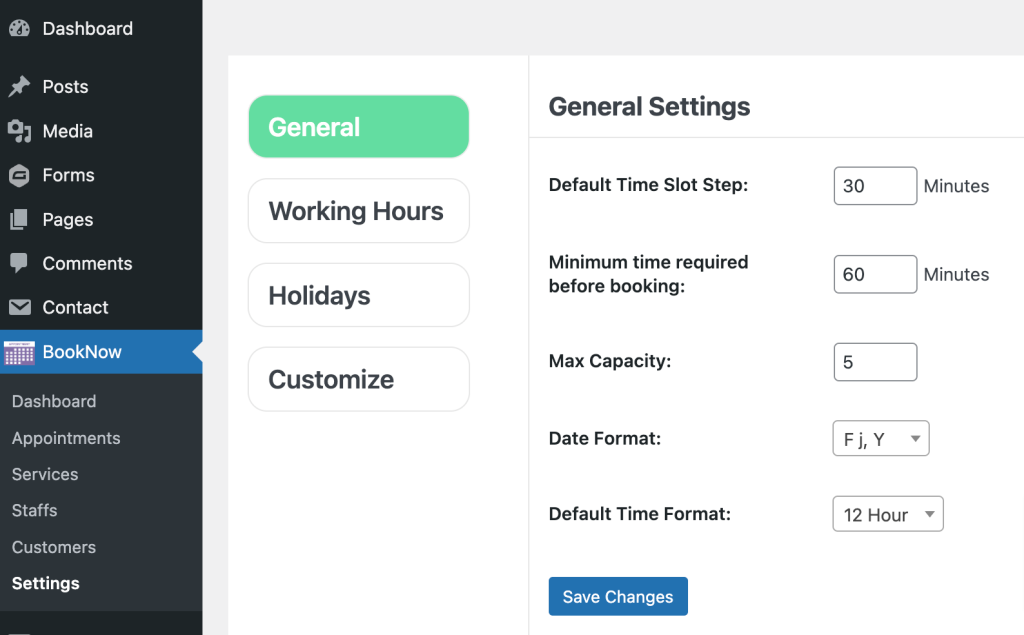
In the general category you can alter the following information:

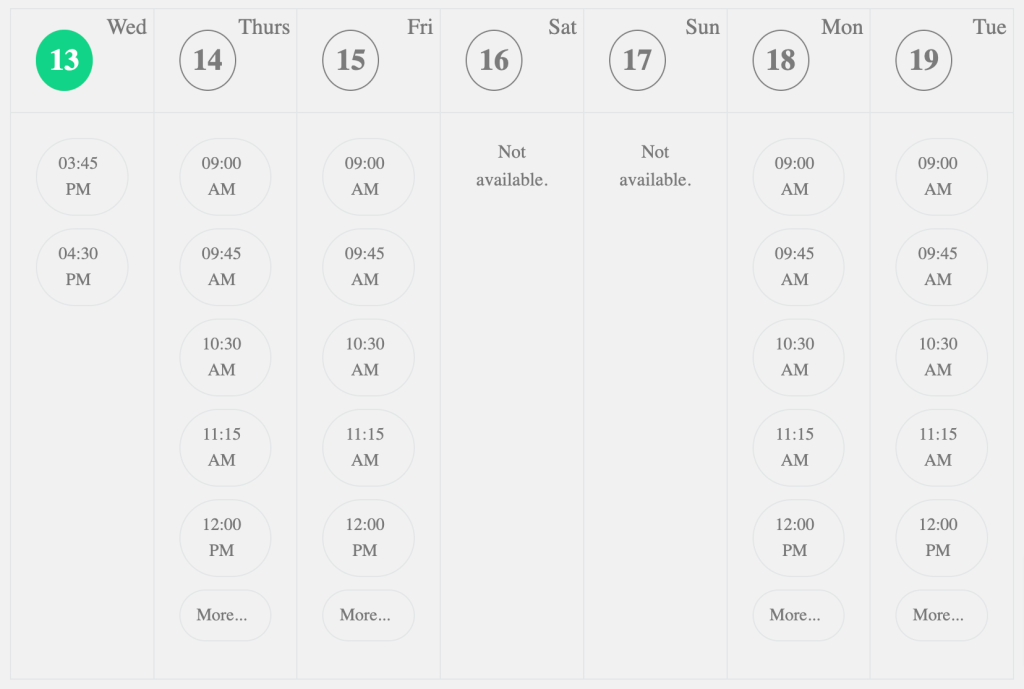
- Default Time Slot Step: This is where you can set the duration of a single appointment. By default, appointments are set at 30 minutes. So when you’re creating an event, you can set its length to over 30 minutes, but not less than that.
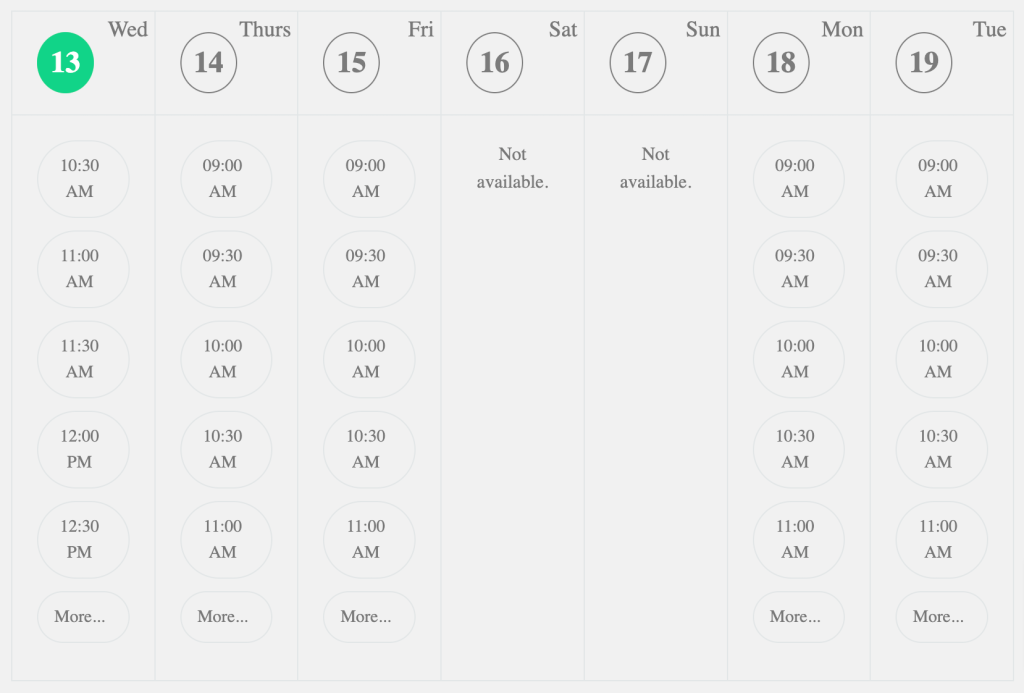
E.g: We change Slot Step to 45 minutes:
- Minimum time required before booking: This lets you set how much time in advance a customer needs to make a booking.
- Max Capacity: Maximum number of consumers who can book service simultaneously.
- Date Format: d/m/y, m.d.y…..
- Default Time Format: Time dimensions (12 hours or 24 hours)
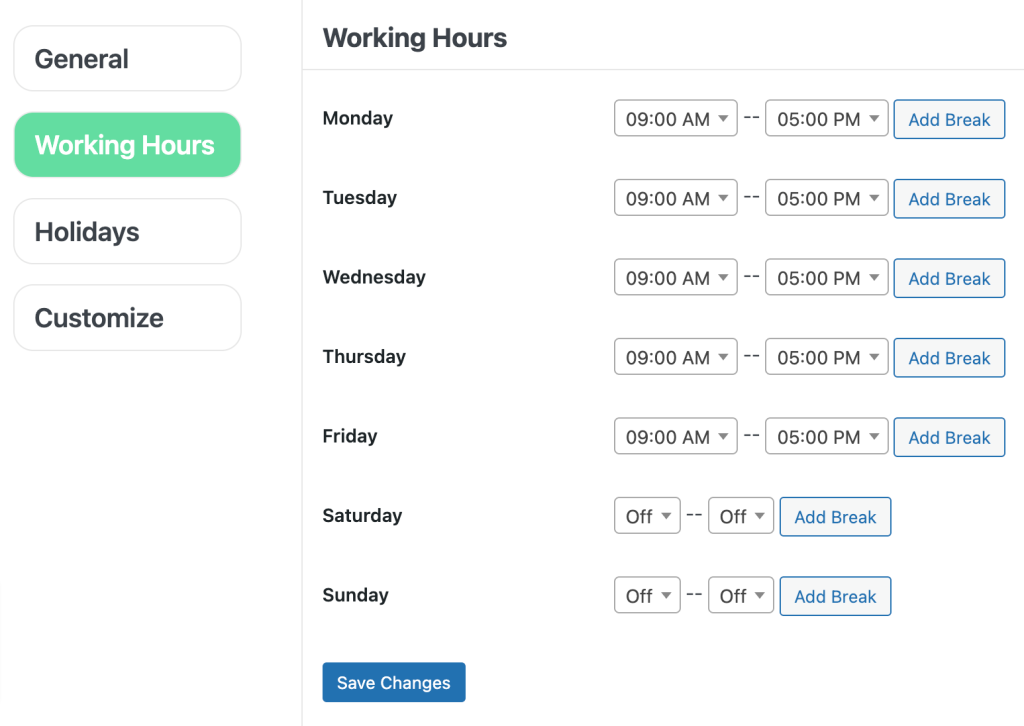
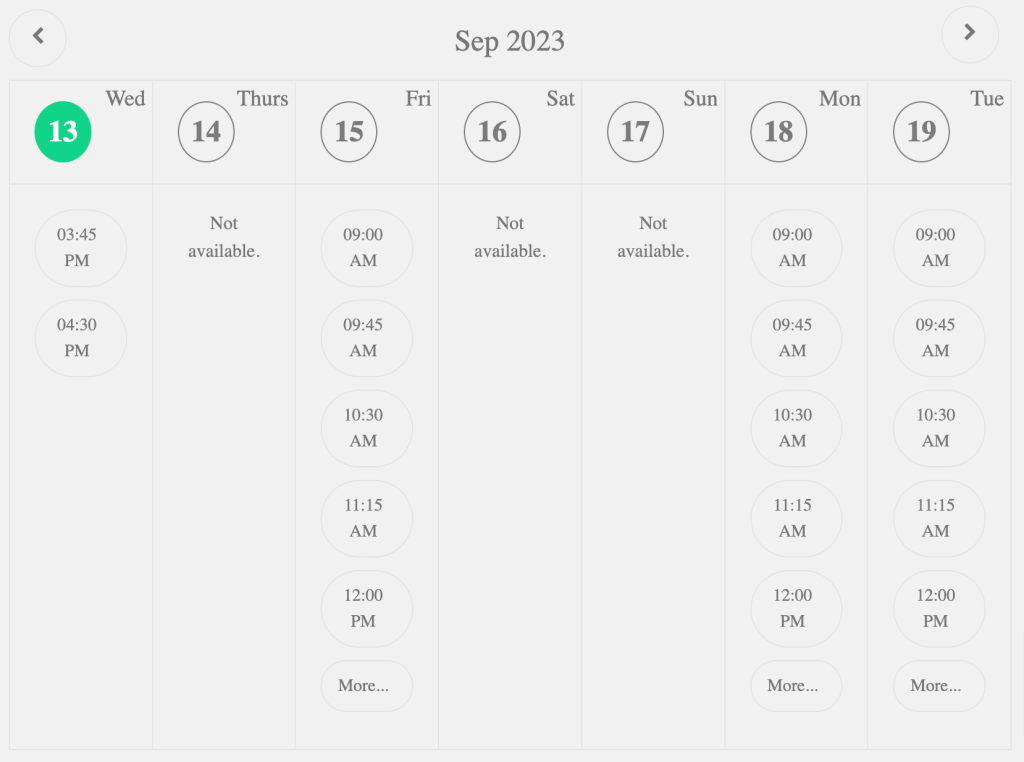
At the working hour category: In these settings, you may specify your business’s operating hours for each day, including weekends.
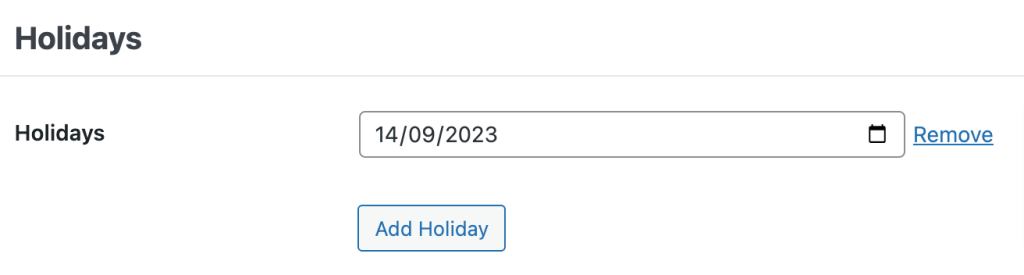
In the holidays category: You can also use these options to set days off — whether they are public holidays, vacations, or any other planned or unplanned time off.
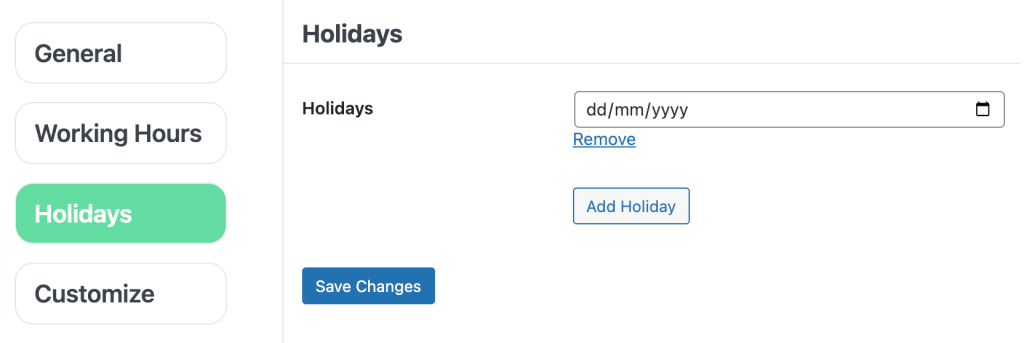
E.g: We marked September 14, 2023, as a day off.
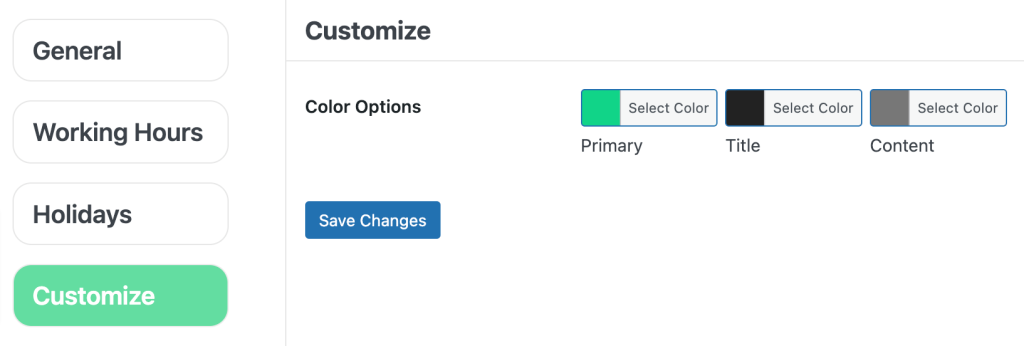
At Customize category: You can change the color for primary, title, subtitle, content…
Create Services
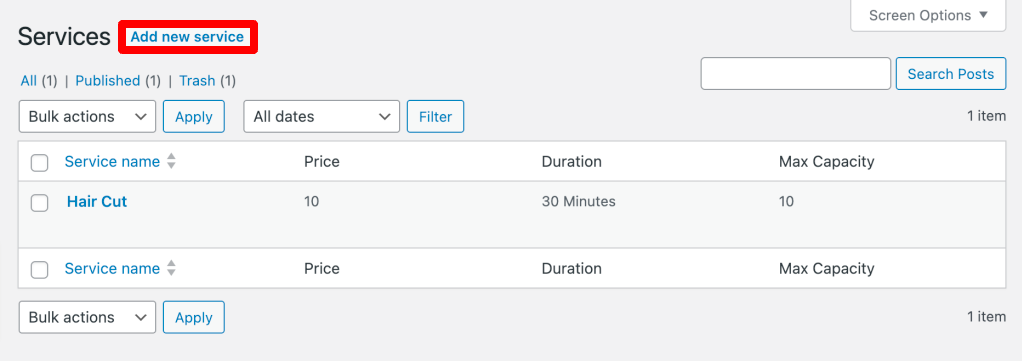
To begin, go to the dashboard and select the BookNow menu item. Then, choose Services.
Services are organized, and a variety of services can be added. Click the Add New Service button in the top right corner to begin creating your services.
When you click Add New Service, a new window appears as below, you can fill in the details related to your services such as Name, Price, Duration, Max Capacity, and Description.
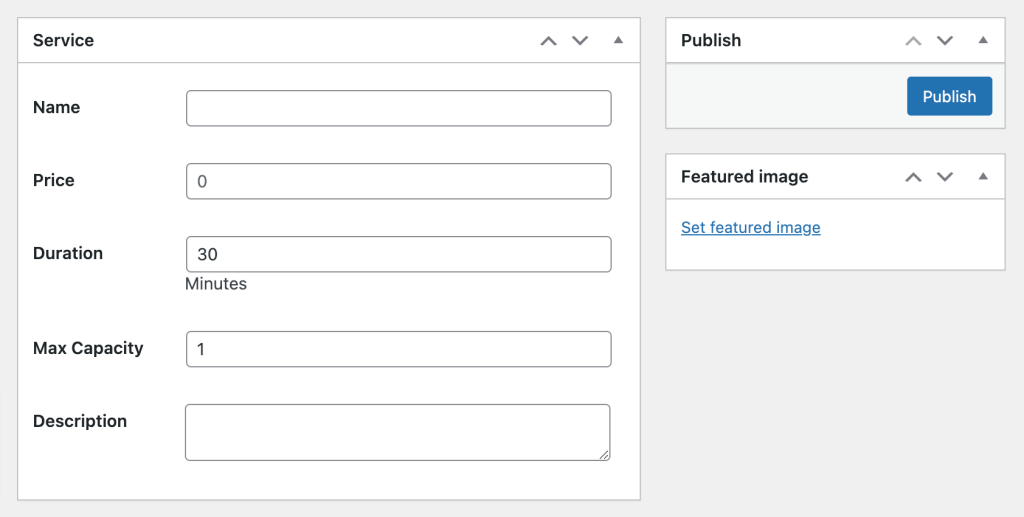
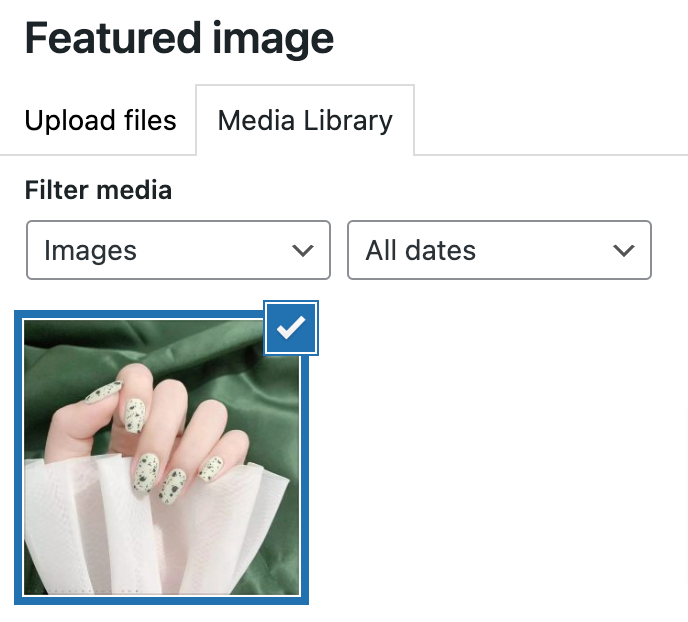
On the right side, click Featured Image to upload a photo of your service.
Finally, Save and have a preview.
E.g:
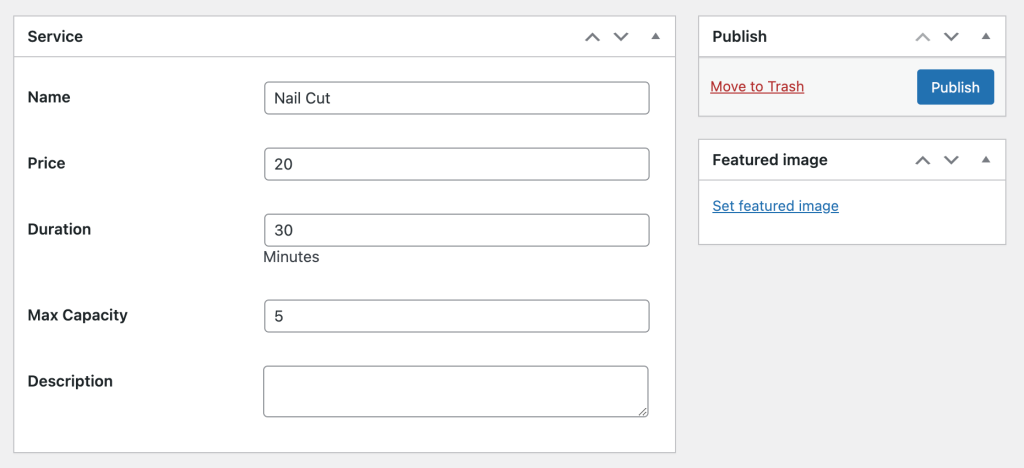
We’ll be using a haircut as a default example and we want to add another type of service: Nail cut. We input nair service details like below:
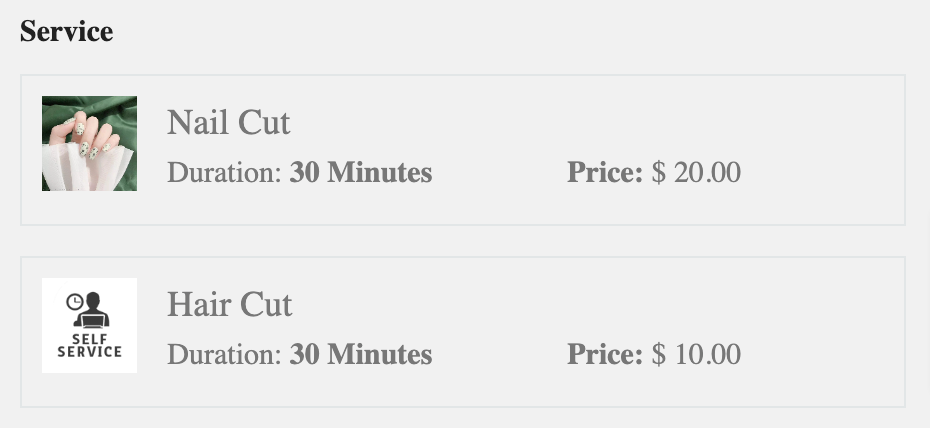
then look at a preview:
Adding staffs
In a similar way above, Choose the BookNow menu option. Then, select Staff. You can add a variety of staff members. Click the Add new staff button in the top right corner to add new staff members. And you can organize your employees in accordance with each service provided.
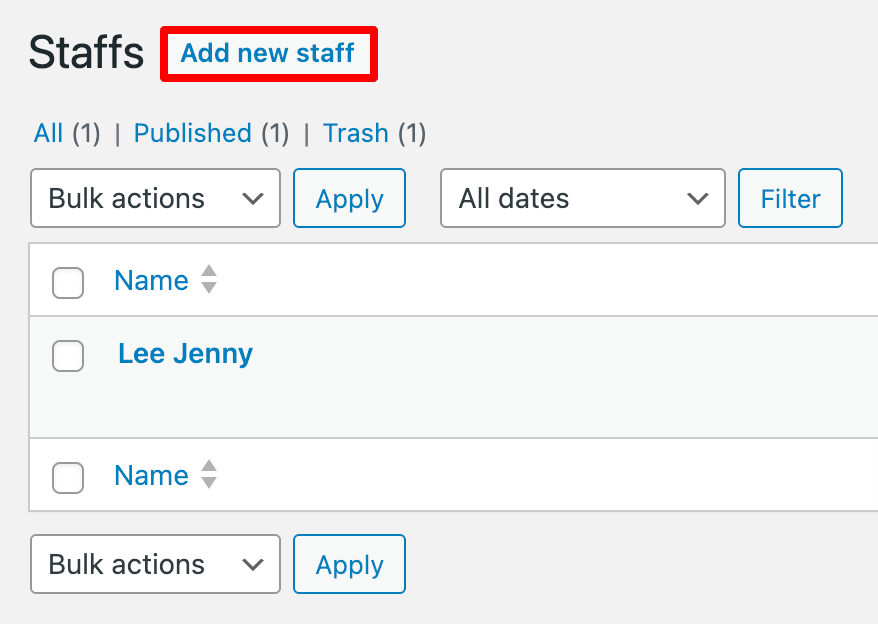
When you click Add new staff, a new window appears as below, here you can fill in the information related to your staff. Remember to click on the blue Publish button.
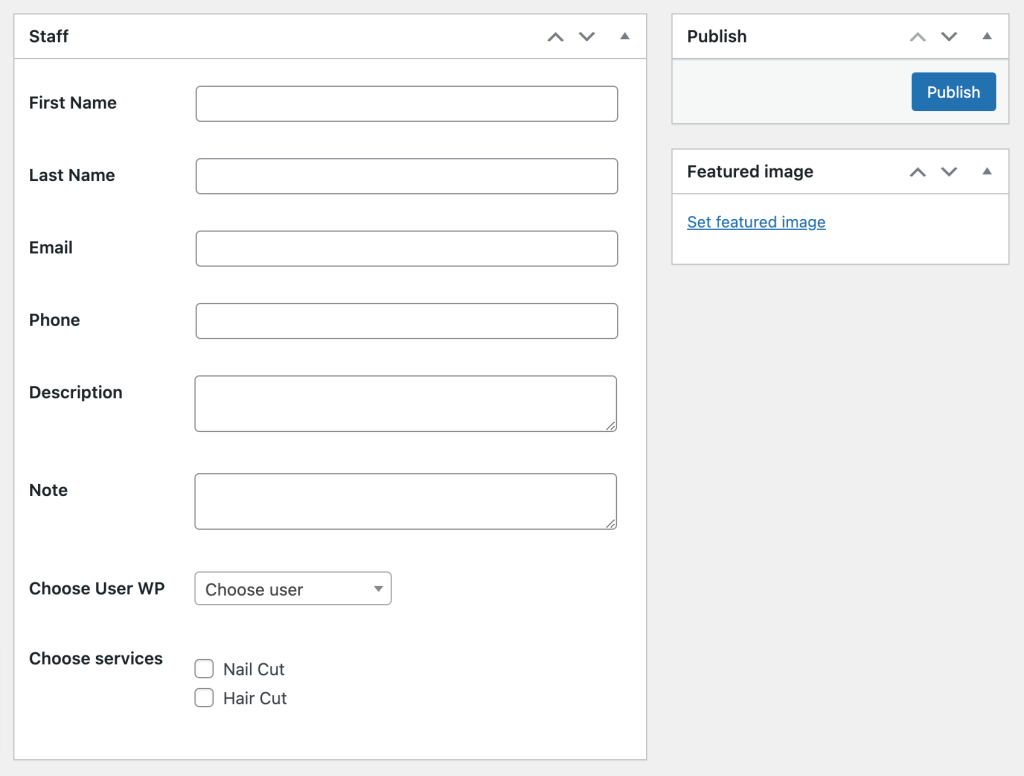
On the right side, click Featured Image to upload a photo of your staff.
E.g:
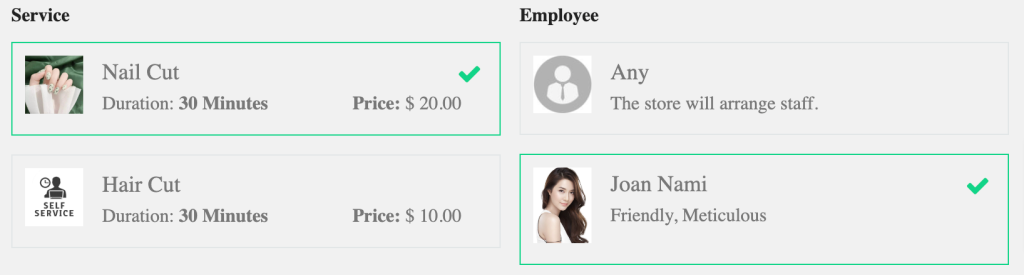
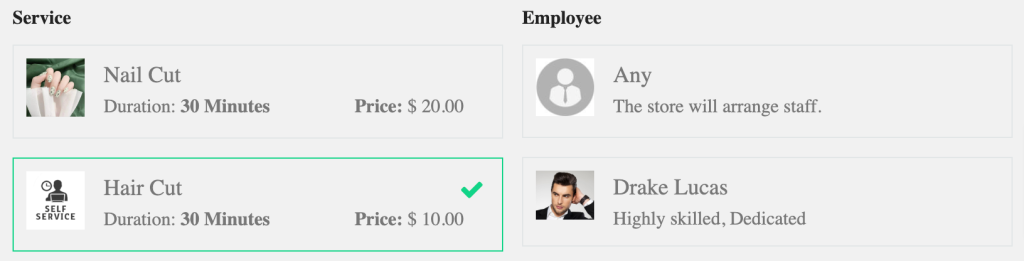
We would want to hire two new employees: Lucas Drake for haircut and Nami Joan for nail cut, as indicated in the picture.
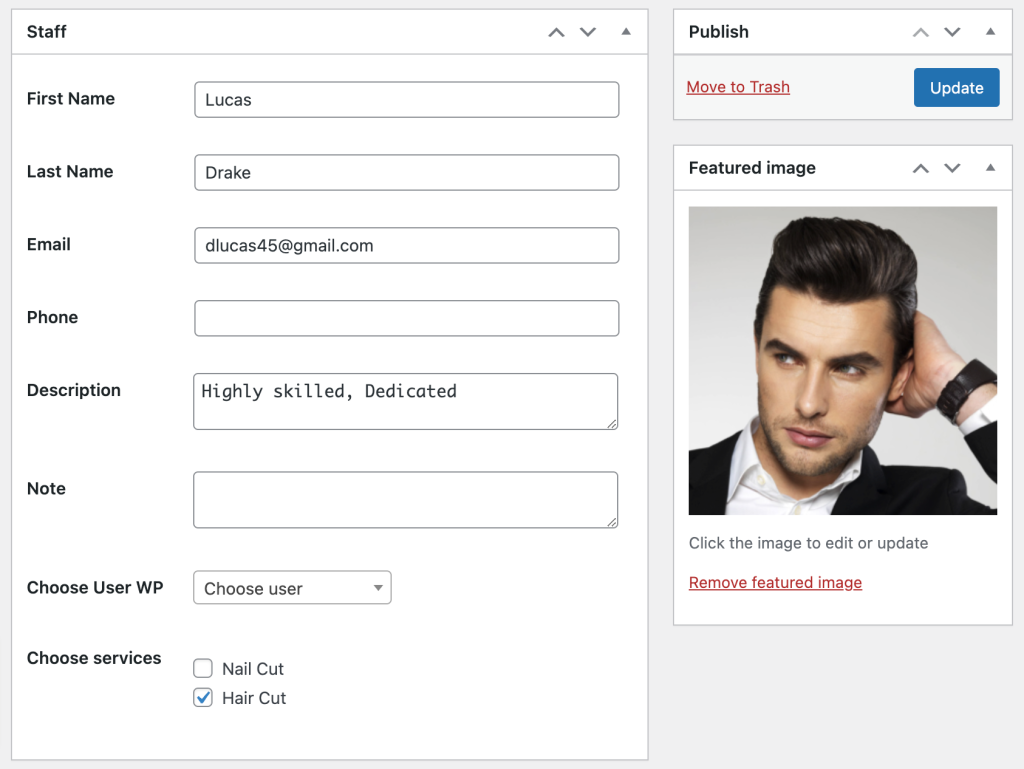
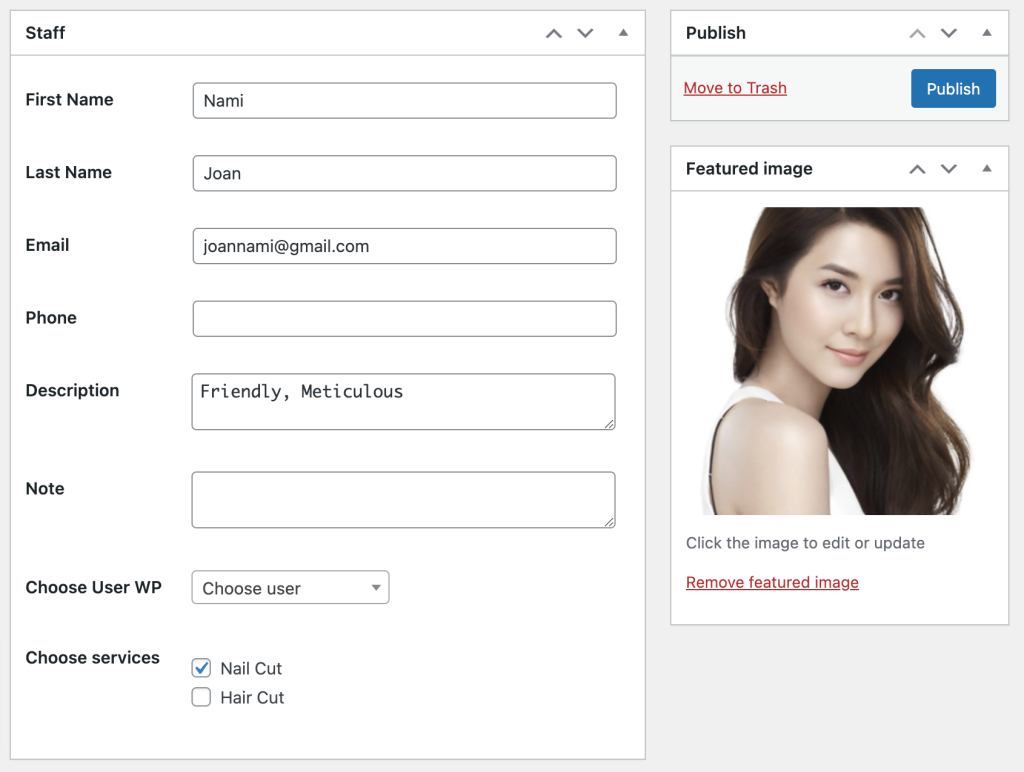
Now, let’s observe the outcome: When I choose the Nair Cut service, Nami is indicated while Lucas remains unseen. Similarly, when I decide on the Hair Cut service, Nami becomes invisible and Lucas is highlighted.
Create a new form with booking forms
From your WordPress dashboard, hover over the Gravity Forms menu. Next, click Add New, then choose Blank form and give the page name.
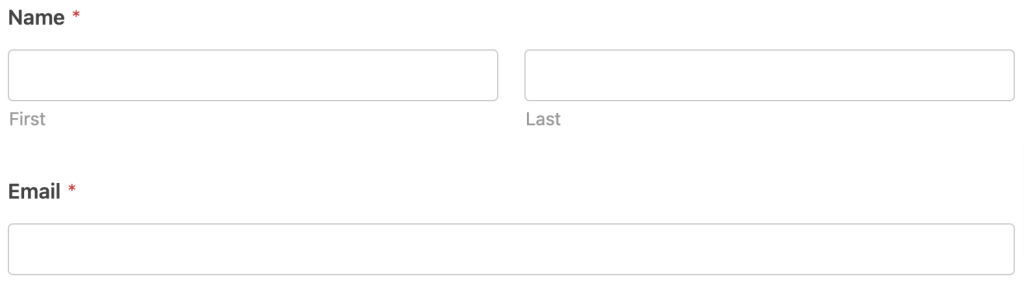
At the interface of Gravity Forms, on the left side, drop down some field that you think is essential for a booking such as Name, Phone, and Email…where customers input personal information. You can insert any fields you want related to your form purpose.
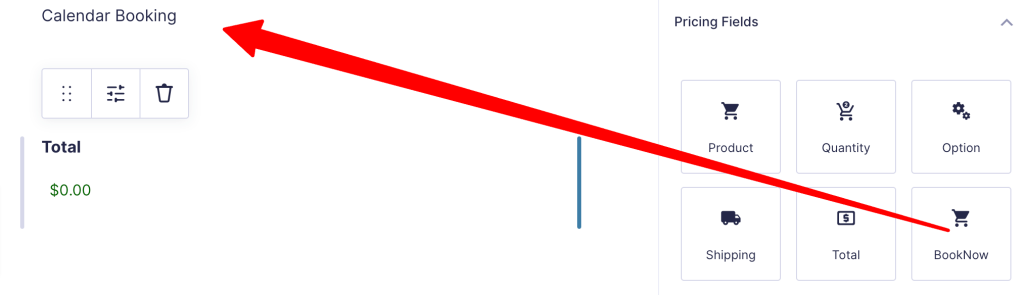
At the Pricing Field, Drop down the BookNow field to open the booking package.
Before taking the next step you should save and have an overview for considering any details, add or remove fields….
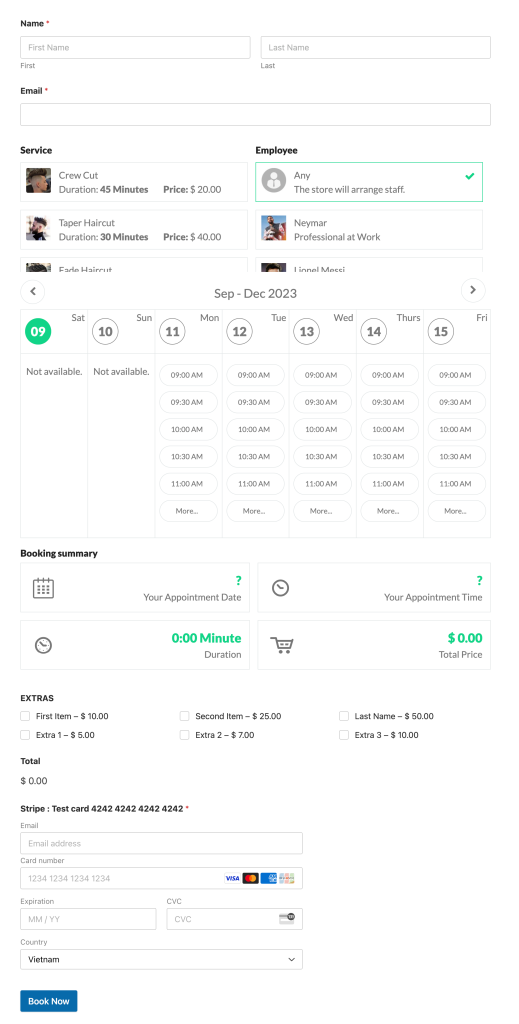
Please look at below the form after adding the booking:
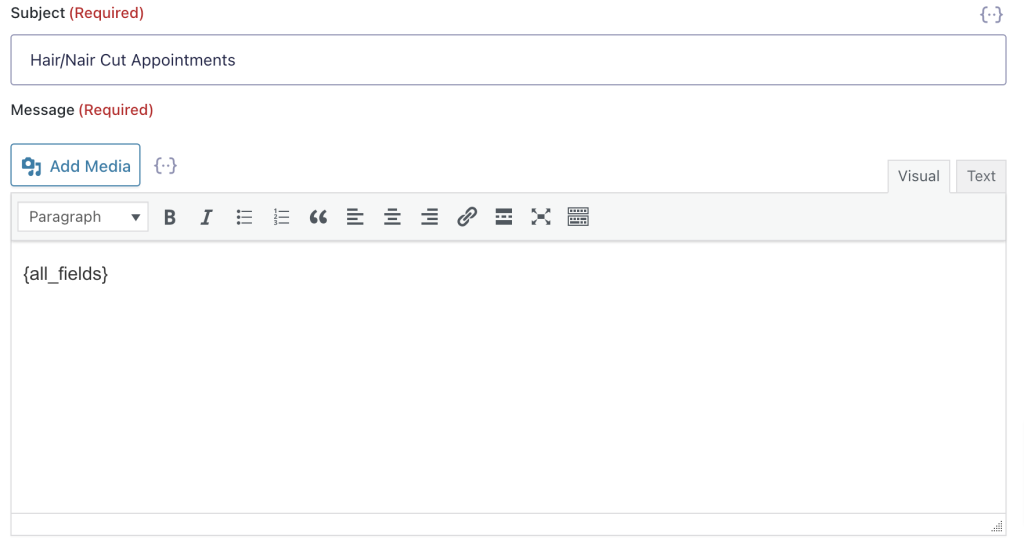
Email Notifications
Click on Settings in the left-hand menu. Then, select Notifications.
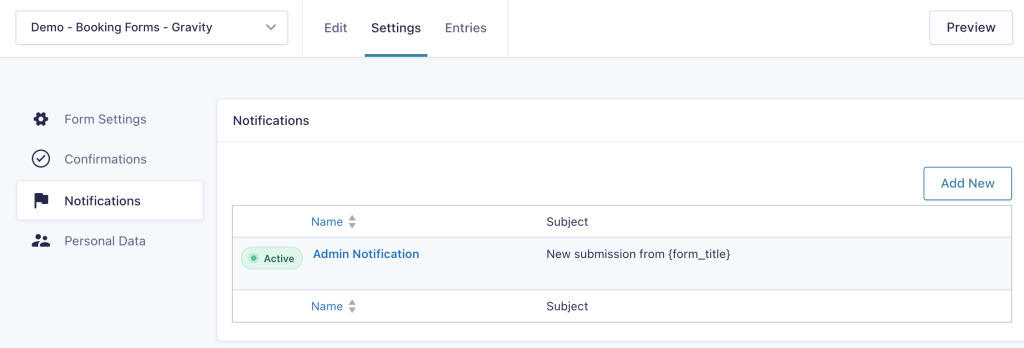
On this screen, Click to Edit Admin Notification.
Then find the Send To Email field. By default, this is set to {admin_email}. This is a dynamic value that tells WordPress to use the email address that’s linked to your WordPress admin account.
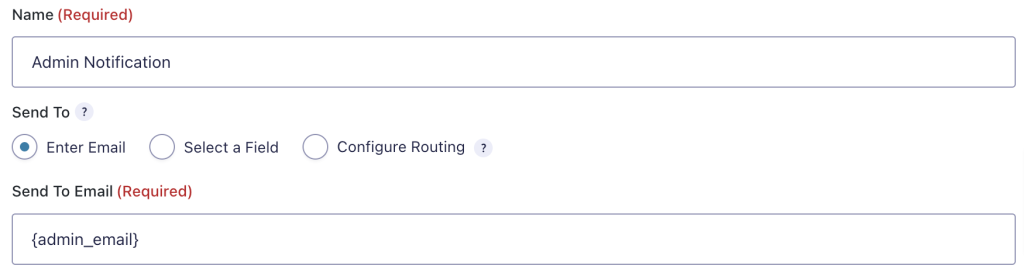
You can delete this dynamic text and replace it with any other email address. Simply type the new address directly into the Send To Email field.
In Conclusion
We hope this article helps you find out more about the Booking form.
It simplifies the reservation process, saves time, and improves user satisfaction. It is a valuable tool for streamlining bookings and enhancing efficiency.
“Explore the convenience of our booking form now!”
Related docs
You might want to review this document: