Today, integrating online booking into your website is amazing especially if you sell services. Booking forms provide an effortless process for your customers. They might choose their services based on your availability.
Do you also want to allow customers to make appointments on your website directly? Then you should read this article.
What is a WordPress Booking Form?
A WordPress booking form is a form that allows users to book or schedule appointments with you or your business directly from your WordPress website.
Simple booking forms normally ask for the customer’s name, service, preferred day and time, and the fee. There are many services needed for booking forms. They can be used to reserve a hotel room or a doctor’s appointment, as well as services like nail or hair visits…
First, let’s find out some benefits of using WordPress booking forms with Gravity Forms.
Why should you add a Booking Form in WordPress with Gravity Forms?
Generating a booking form in WordPress can offer several advantages depending on your website’s purpose and functionality. Here are a few reasons why you might want to create a booking form:
- Online Reservations: If you run a business that provides services or accepts reservations, such as a hotel, restaurant, salon, or event venue, a booking form allows your customers to make reservations online. This convenience can attract more customers and streamline your booking process.
- Time and Resource Management: A booking form helps you manage your time and resources more efficiently. By allowing customers to book appointments or services online, you can minimize phone calls, reduce administrative work, and avoid scheduling conflicts.
- User Convenience: Offering a booking form on your WordPress website makes it convenient for users to request appointments or services at any time. They don’t have to wait for business hours or rely on phone calls or emails to make a booking.
- Integration with Payment Gateways: If your business requires upfront payments or deposits, a booking form integrated with payment gateways allows customers to make secure payments while booking their appointments or services.
- Data Collection and Analysis: By using a booking form, you can collect valuable customer data, such as contact information, preferences, and booking history. This data can help you understand your customers better, personalize their experience, and analyze booking patterns to improve your business strategies.
- Automation and Notifications: A booking form can automate several processes, such as sending confirmations, reminders, and notifications to both customers and your team. This automation reduces the chances of human error and ensures a smooth booking experience.
Overall, making a booking form in WordPress offers convenience, efficiency, and customization options for businesses that rely on appointments, reservations, or service bookings. It enhances the user
How to Add a Booking Form (Step-by-Step) with Gravity Forms?
Step 1: Install and activate the plugin
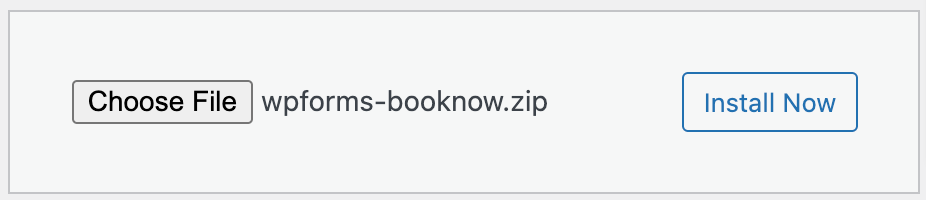
After downloading the plugin, it’ll be saved as ZIP files on your device.
Installing Gravity Forms BookNow is easy and similar to installing any other WordPress plugin. Now, go back to the WordPress dashboard and open Plugins >> Add New >> Upload Plugin and choose the ZIP files, then install and activate it.

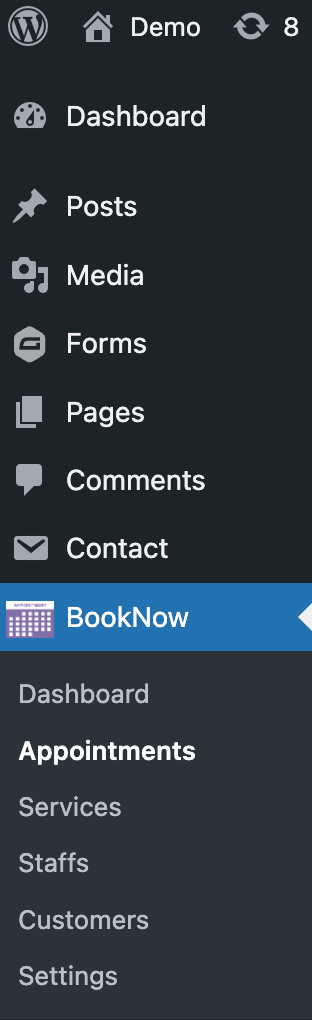
After the plugin is activated and installed, a new menu item will appear on your WordPress sideboard.
Step 2: Create a new form with booking forms
From your WordPress dashboard, hover over the Gravity Forms menu. Next, click Add New, then choose Blank form and give the page name.
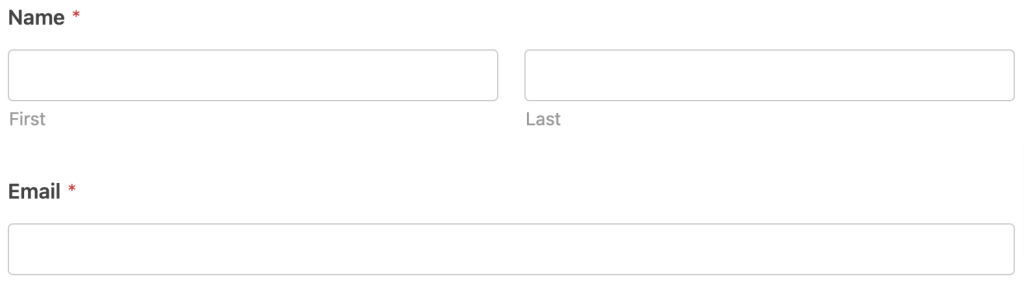
At the interface of Gravity Forms, on the left side, drop down some field that you think is essential for a booking such as Name, Phone, and Email…where customers input personal information. You can insert any fields you want related to your form purpose.
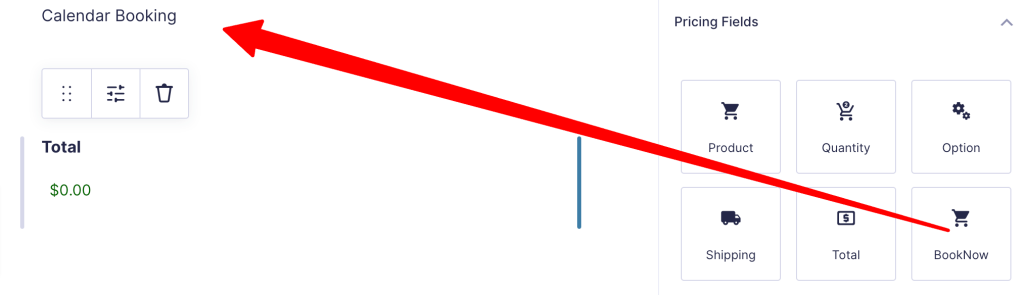
At the Pricing Field, Drop down the BookNow field to open the booking package.
Step 3: Configuring the BookNow form
At the BookNow from Field Option: you can change the label, show/hide service or staff.
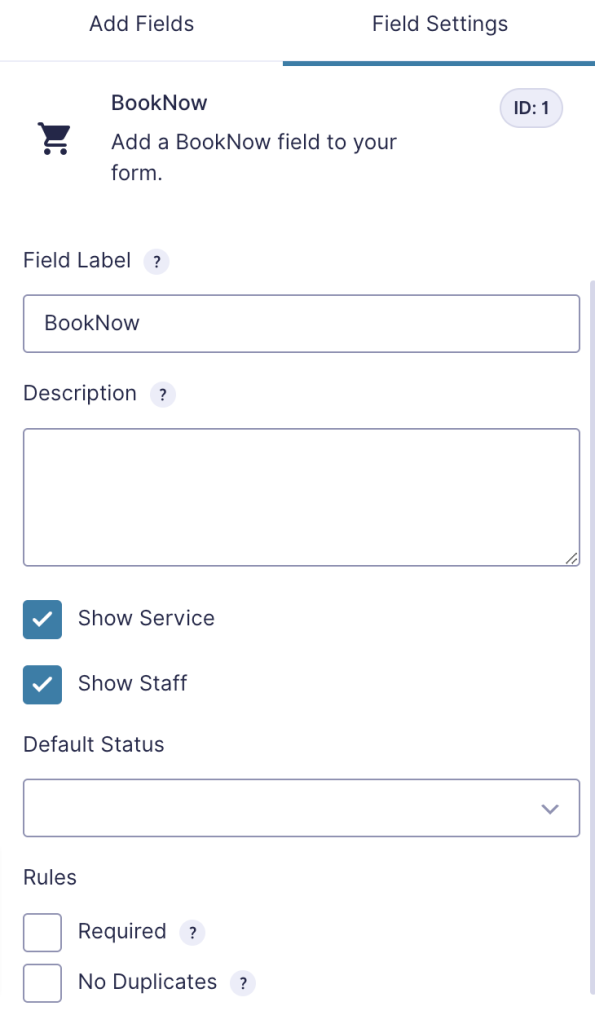
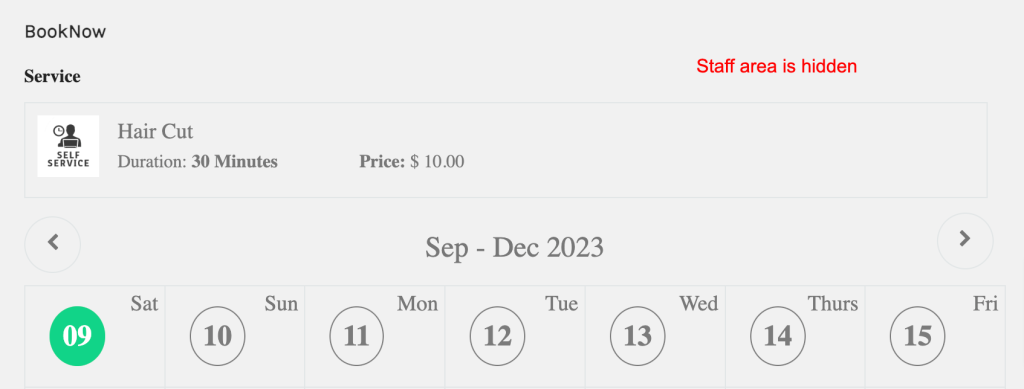
If you don’t click on the staff/service button, the staff/service area will be hidden
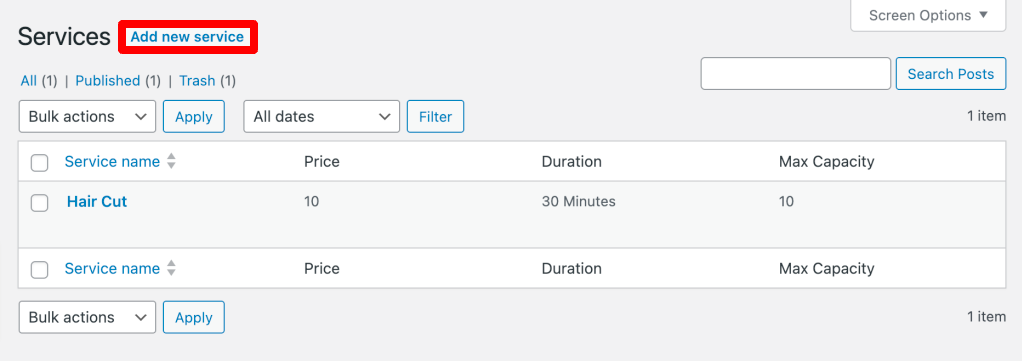
Create Services
Select the BookNow menu item from the dashboard to get started. Then, select Services.
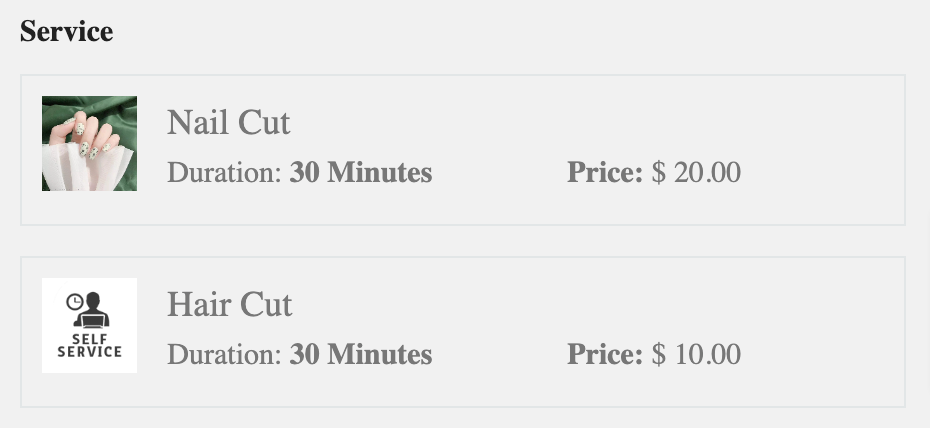
Services are organized and you can add an array of services. To build your services, click the Add new service option in the top right corner.
E.g:
We’ll be using a haircut as a default example and we want to add another type of service: nail cut. When we click Add new service, a new window appears as below, here we can fill in the details related to our services such as Name, Price, Duration, Max Capacity, and Description.
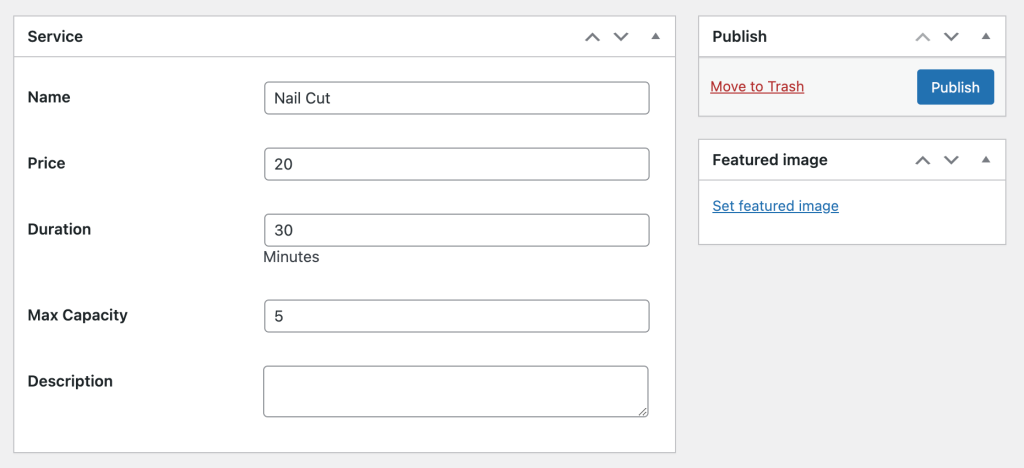
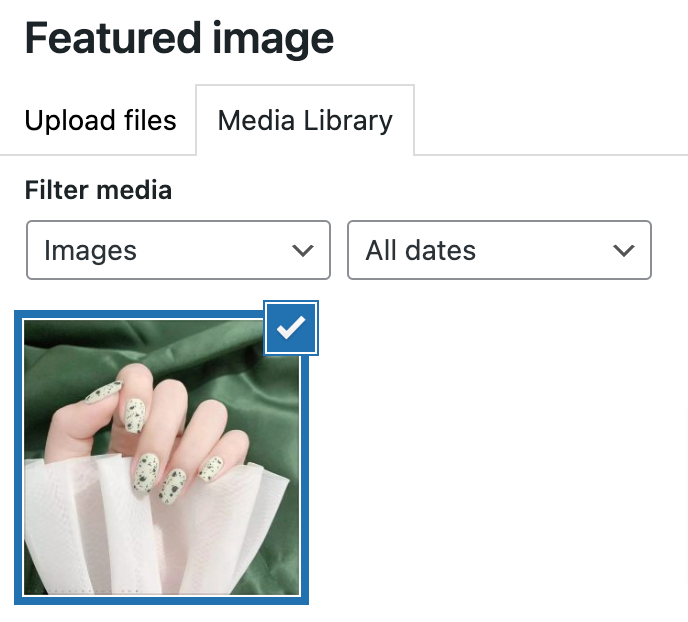
On the right side, click Featured Image to upload a photo of your service.
Publish and have a preview.
Adding staffs
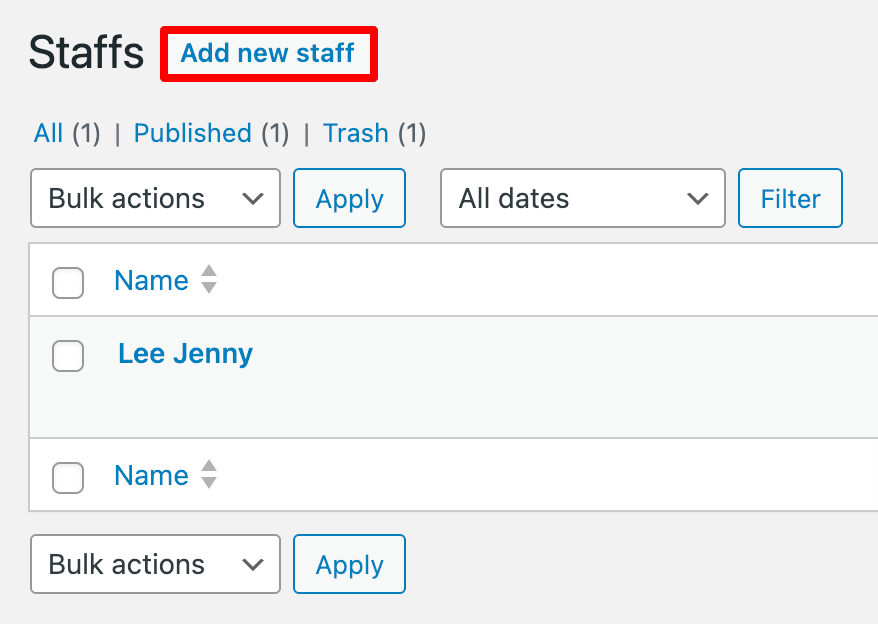
In a similar way above, Choose the BookNow menu option. Then, select Staff. You can add a variety of staff members. Click the Add new staff button in the top right corner to add new staff members. And you can organize your employees in accordance with each service provided.
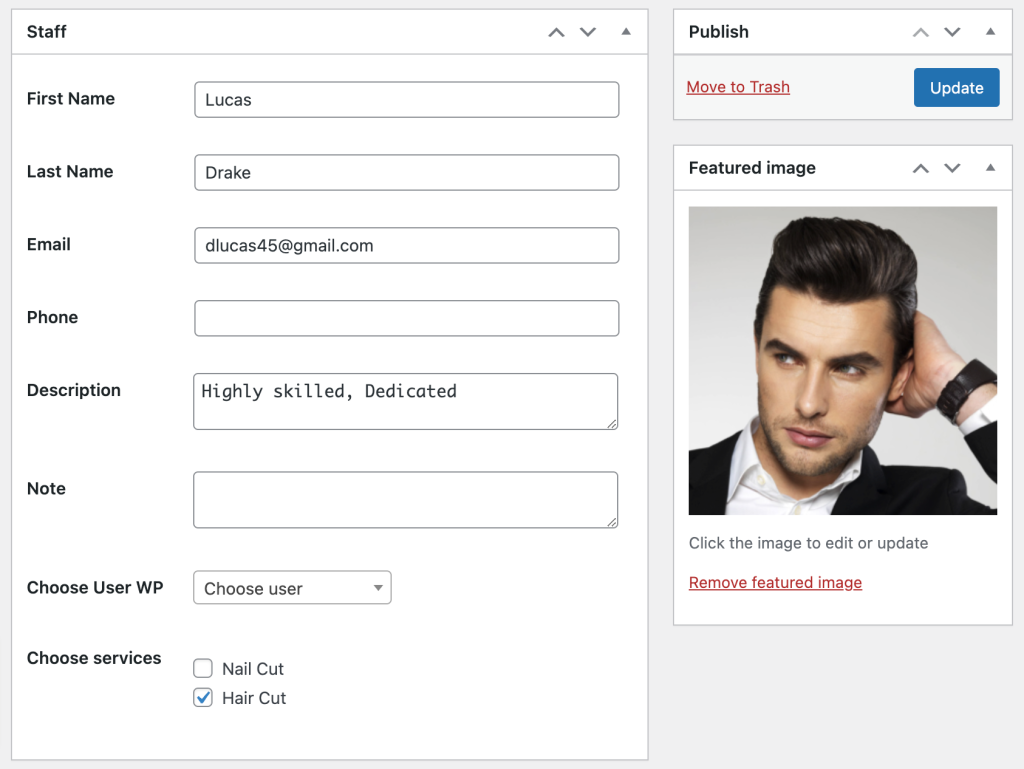
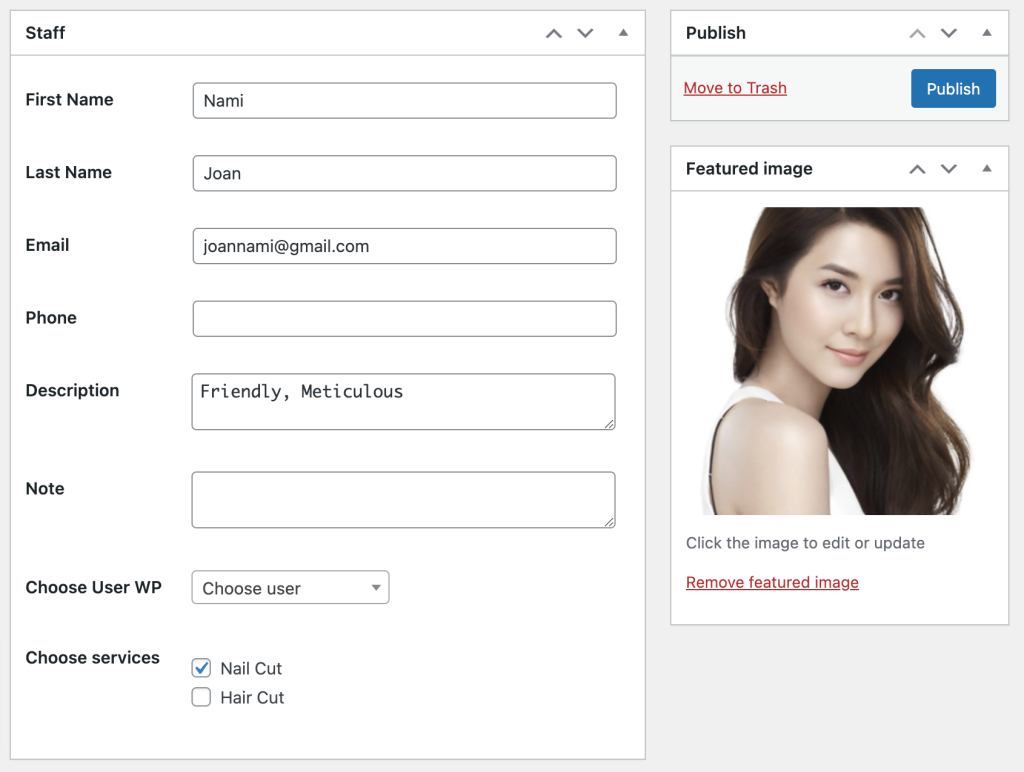
When you click Add new staff, a new window appears as below, here you can fill in the information related to your staff. Remember to click on the blue Publish button.
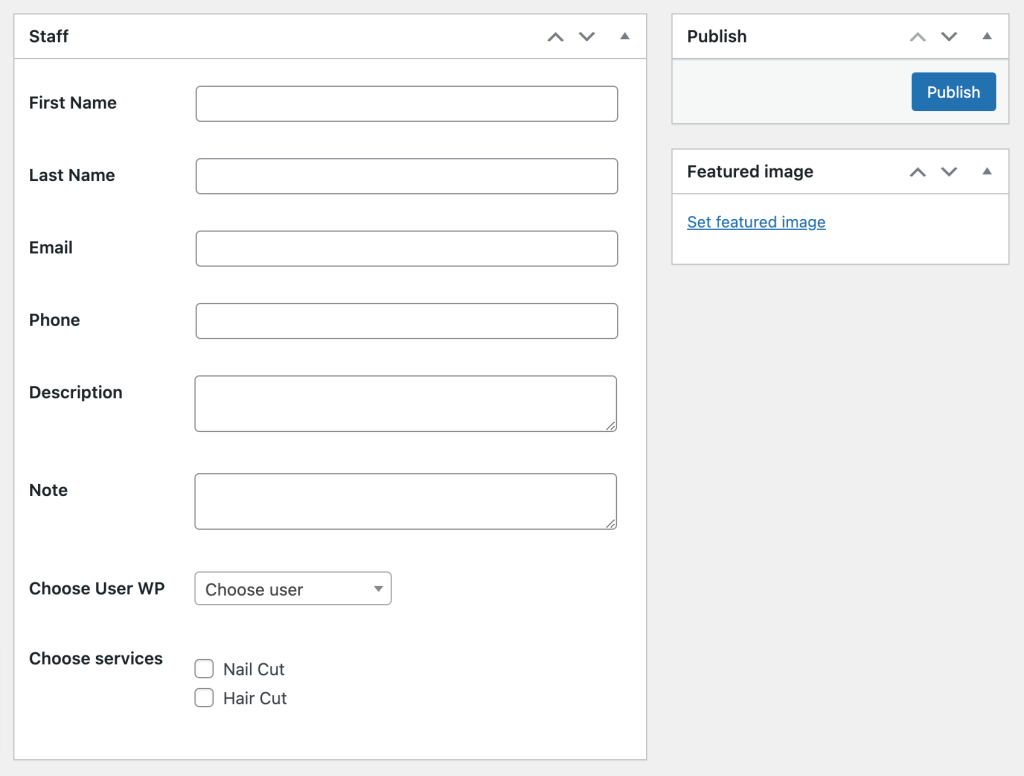
On the right side, click Featured Image to upload a photo of your staff.
E.g:
We would want to hire two new employees: Lucas Drake for haircut and Nami Joan for nail cut, as indicated in the picture.
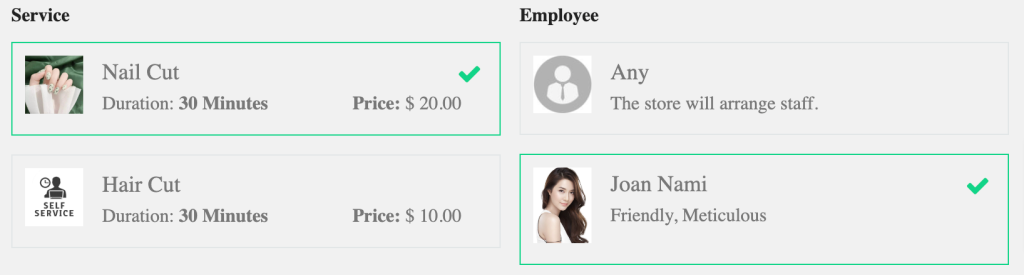
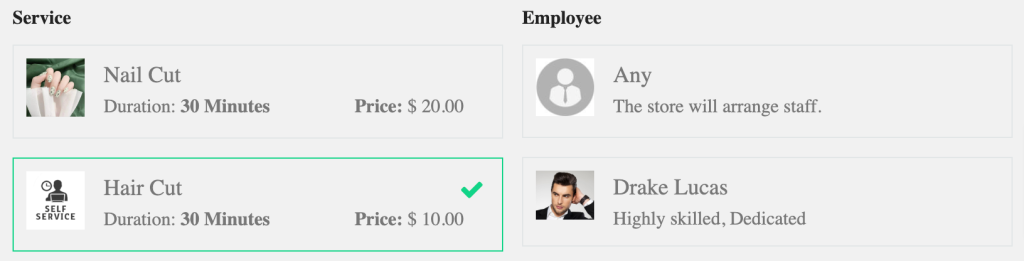
Let’s see the result: When I pick Nair Cut service, Nami indicated while Lucas is hidden. Similarly when I choose Hair Cut service, Nami is invisible and Lucas marked.
Setting Booking Form
Select the BookNow menu item in the same manner as described above. Then, choose Settings.
Here you can modify the details of the form like general, working hours, holiday, customize color…
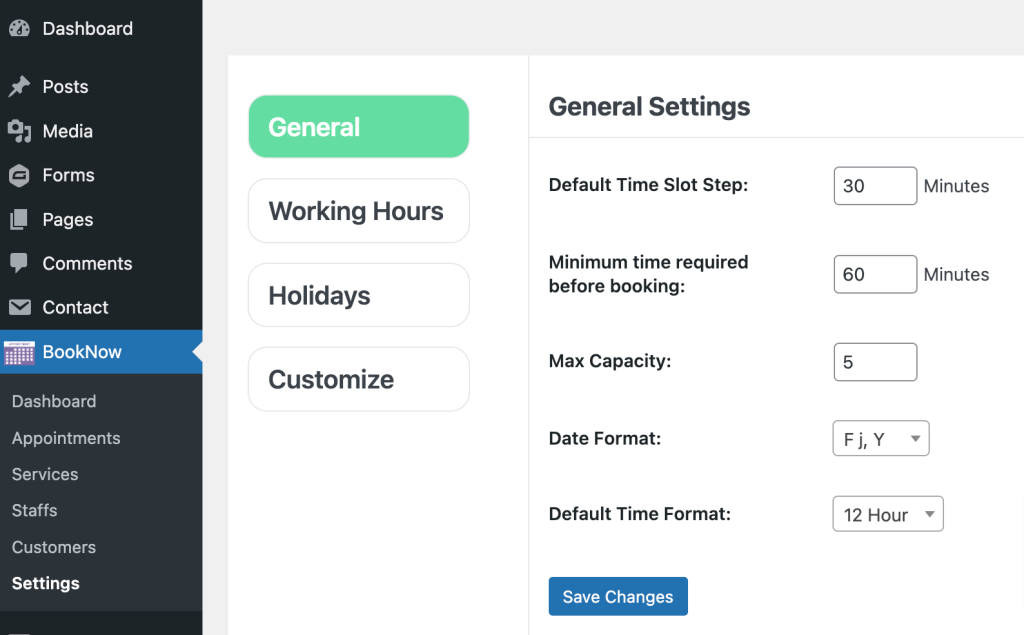
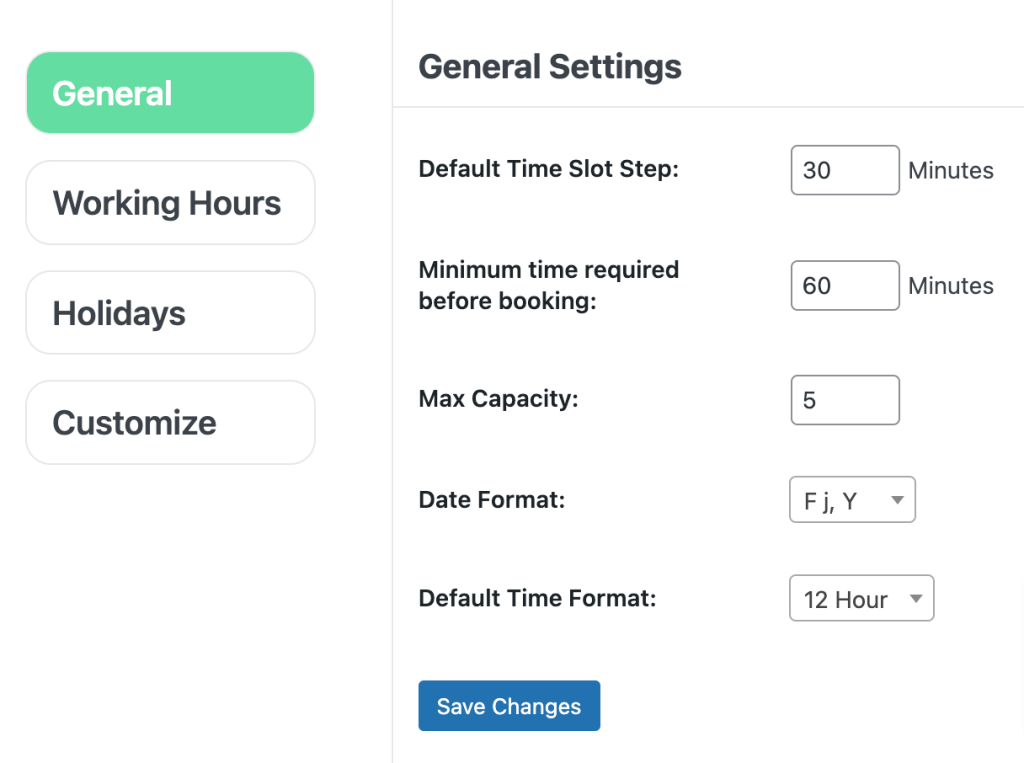
In the general category you can alter the following information:
- Default Time Slot Step: Default Time Slot Step – This is where you can set the duration of a single appointment. By default, appointments are set at 30 minutes. So when you’re creating an event, you can set its length to over 30 minutes, but not less than that.
- Minimum time required before booking: This lets you set how much time in advance a customer needs to make a booking.
- Max Capacity: Maximum number of consumers who can book service simultaneously.
- Date Format: d/m/y, m.d.y…..
- Default Time Format: Time dimensions (12 hours or 24 hours)
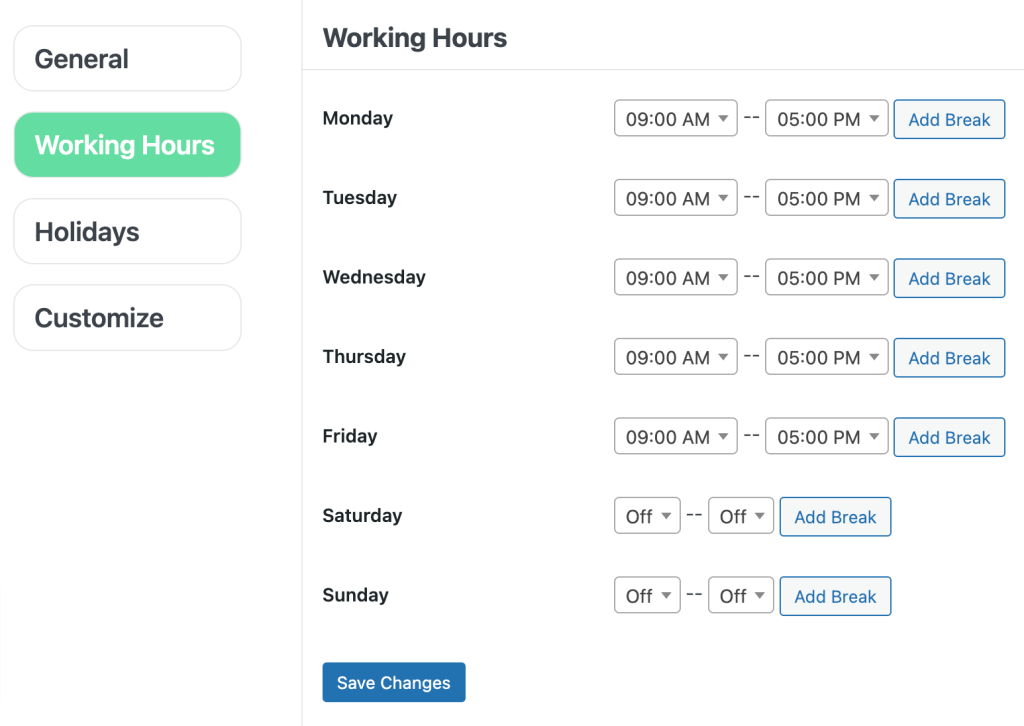
At the working hour category: In these settings, you may specify your business’s operating hours for each day, including weekends.
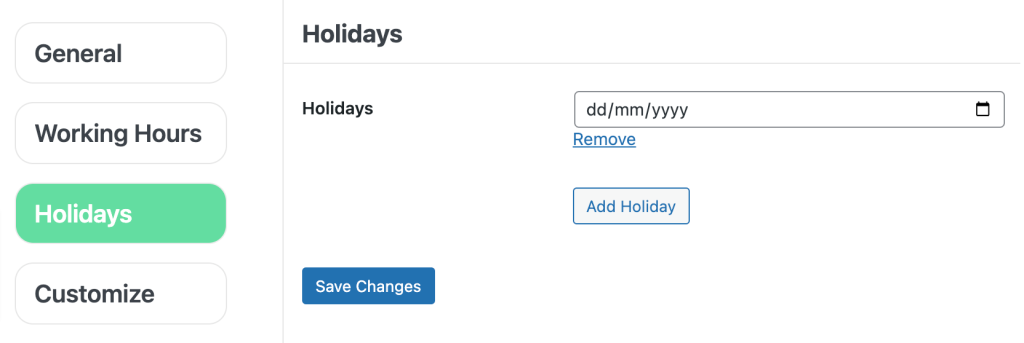
In the holidays category: You can also use these options to set days off — whether they are public holidays, vacations, or any other planned or unplanned time off.
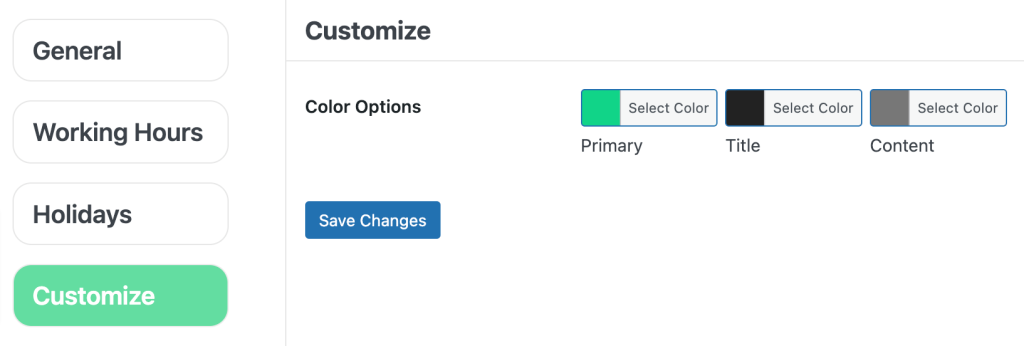
At Customize category: You can change the color for primary, title, subtitle, content…
Dashboard
Navigate to the BookNow menu – Click on Dashboard.
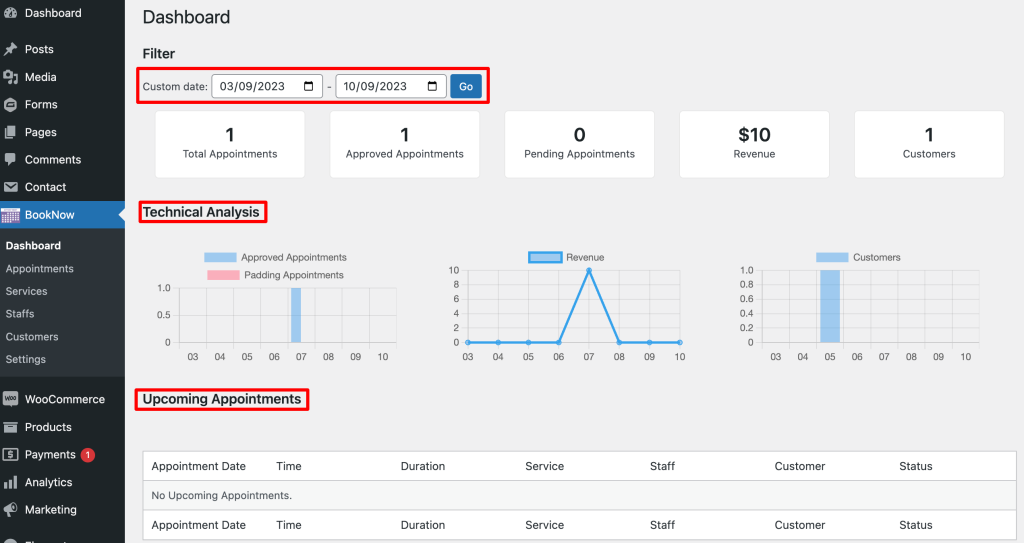
The BookNow admin dashboard is only available to administrators and managers. It contains all of the useful information for you to review, such as Technical Analysis – Approved Appointments, Revenue, Customers, and Upcoming Appointments.
It’s significant that you realize that you can specify the time period for which you want to examine the data. So you can see how many services were booked, what time of day is busiest, and how much money the firm has earned over time.
Appointment
Go to the BookNow tab and choose Appointment.
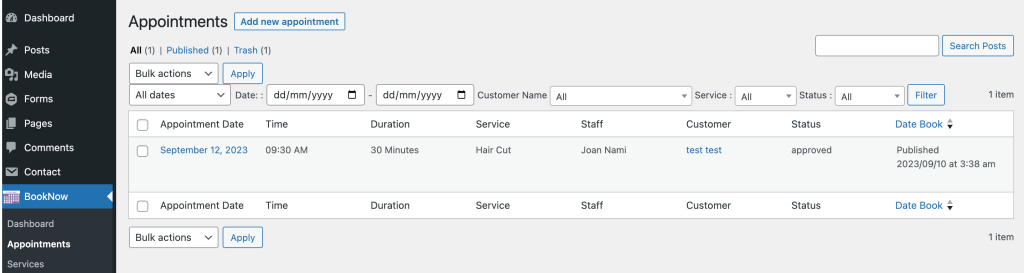
In the appointments section, you can see all of your current appointments and sort them depending on the person performing them, the customer, the service type, the staff, or the appointment’s status.
This part is critical for an administrator or manager because it is where they can change the status of an appointment. So, if you need to accept, cancel, or reject any appointments, this is the location to do so.
It is also vital to keep in mind that the appointment allows you to track employee performance. You can observe who of your staff is getting the most appointments, attracting repeat customers, and which of the services you offer is the most popular.
In Conclusion
As you saw above, utilizing the Gravity Forms plugin by RedNumber Developer empowers your WordPress website with a robust booking form solution. It enables you to streamline your booking processes, improve customer experience, and ultimately grow your business. So why wait?
” Set up the plugin and start optimizing your booking system today”
That’s it. We hope this article is helpful for you to learn more about Creating Booking Forms with Gravity Forms.