By leveraging the Elementor Drag and Drop Multiple File Upload feature, you can provide your website visitors with a seamless and user-friendly file upload experience, allowing them to submit multiple files as part of your forms easily.
Table of contents:
1. Plugin Installation
Download it here: Contact Form 7 – Drag and Drop Multiple Files Upload
Once you’ve downloaded a plugin, you’ll need to install it on your website. Log into your WordPress admin dashboard. Navigate to the “Plugins” section and click on “Add New.” Search for the plugin by name and click “Install Now” once you find it.
After installation, click on “Activate” to activate the plugin.
2. Add Drag and Drop Upload Field
Step 1: On the WordPress dashboard, navigate to Contact Form – Create a new form.
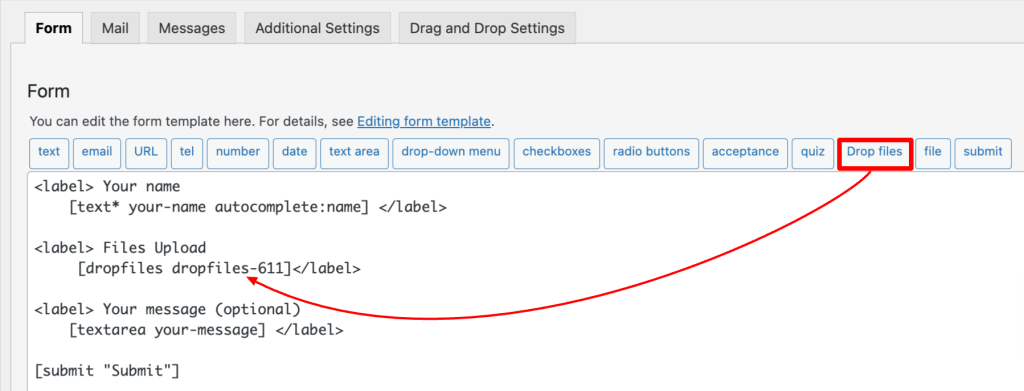
Step 2: In the form editor, select the Drop file tag to add the drag-and-drop multiple file upload feature.
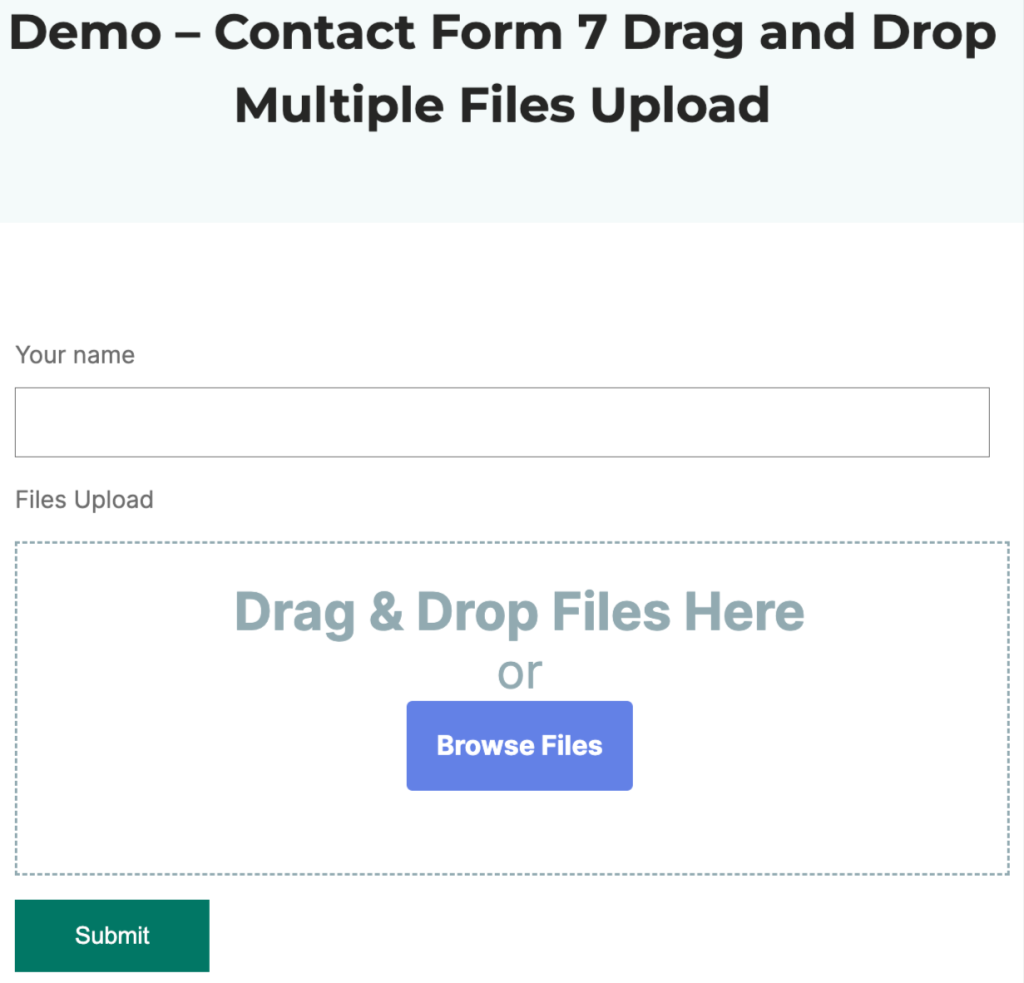
Save and Have a preview:
3. Set File Upload Options
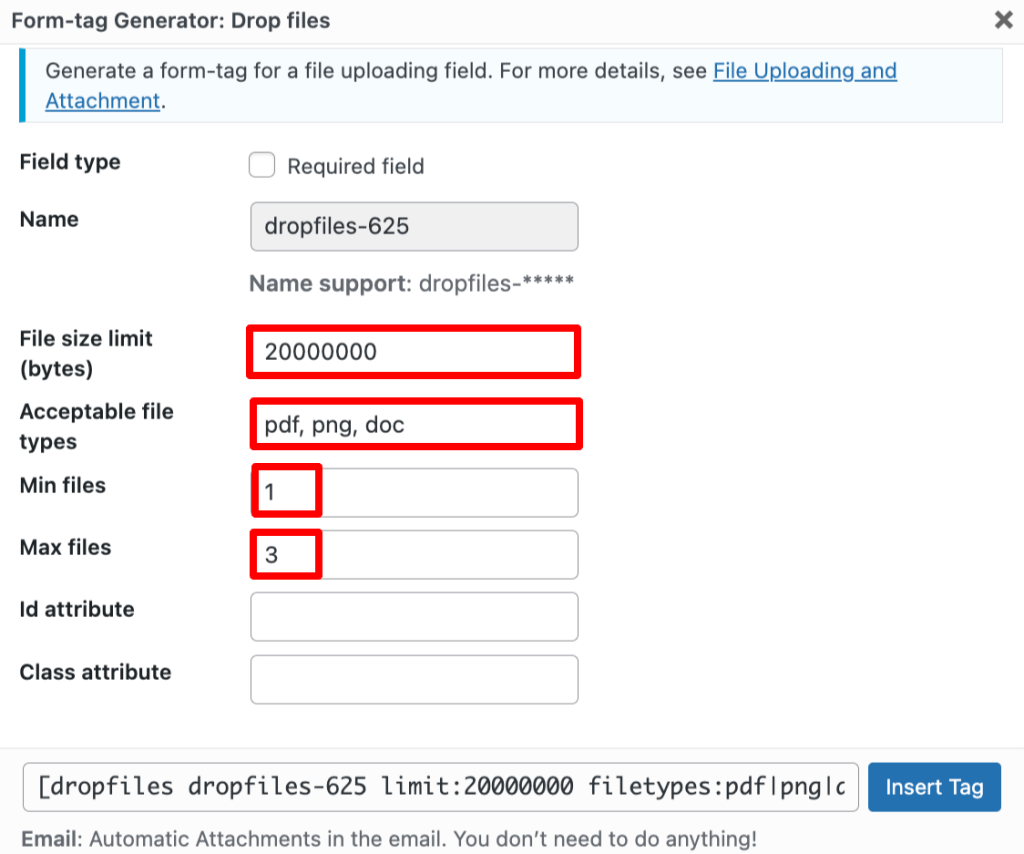
Choose the “Drop File” tag of the Form, you can configure the file upload options:
- File Size Limit (B): Set the maximum file size for the uploaded files.
- File Types: Specify the file types that users are allowed to upload (e.g., .jpg, .png, .pdf).
- Min Files: Determine the minimum number of files that users can upload.
- Max Files: Determine the maximum number of files that users can upload.
Save and Fill out the form:

4. Change the text button
You can replace the default text by navigating to Drag and Drop Settings

5. Email Attachment – top
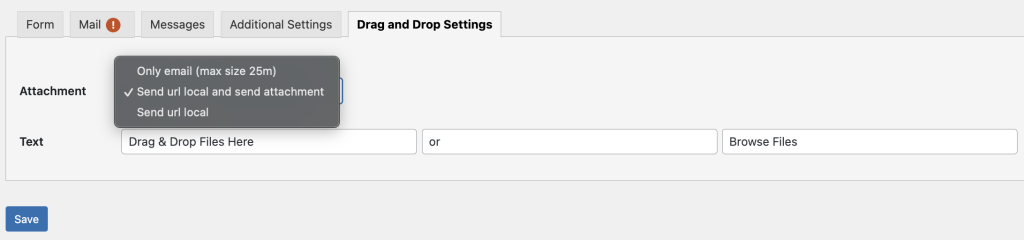
- If you choose the option “Only email (max size 25m)” then automatic attachments in the email. You don’t need to do anything.
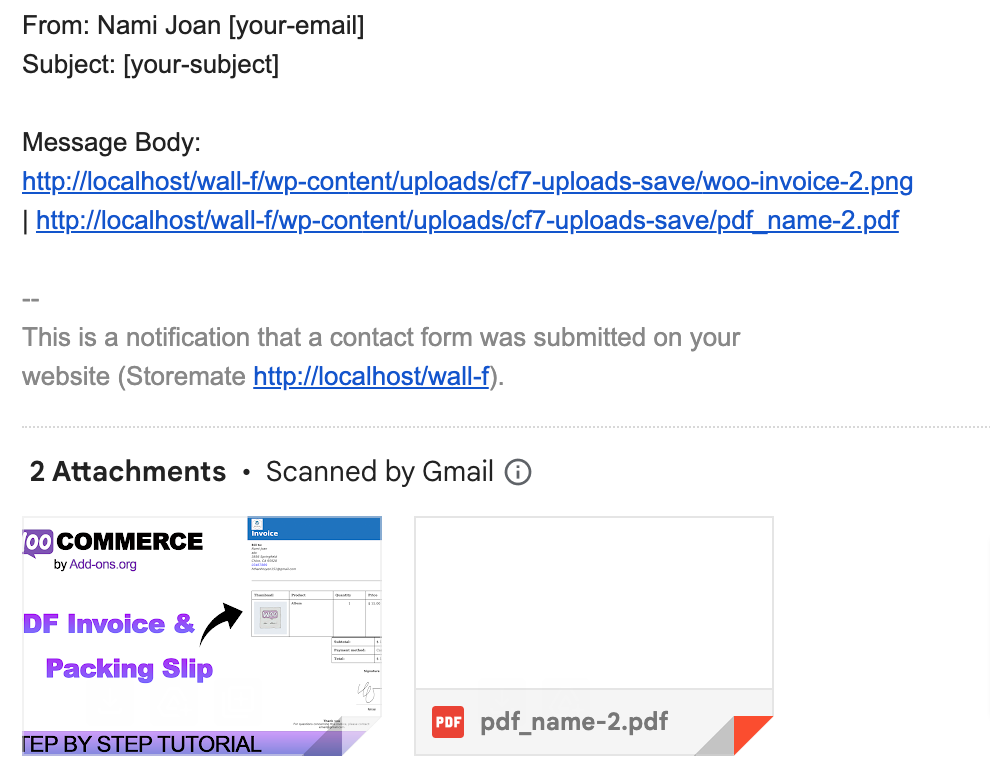
- If you choose the option “Send URL local and send attachment”. This allows the recipient to access and download the file(s) directly from the email.
- If you choose the option “Send URL local”. This allows the recipient to access the file(s) directly from the email.
Then in the tab “mail”, under “Message Body” section -> Add the name field

Submit the form and open the email to see: