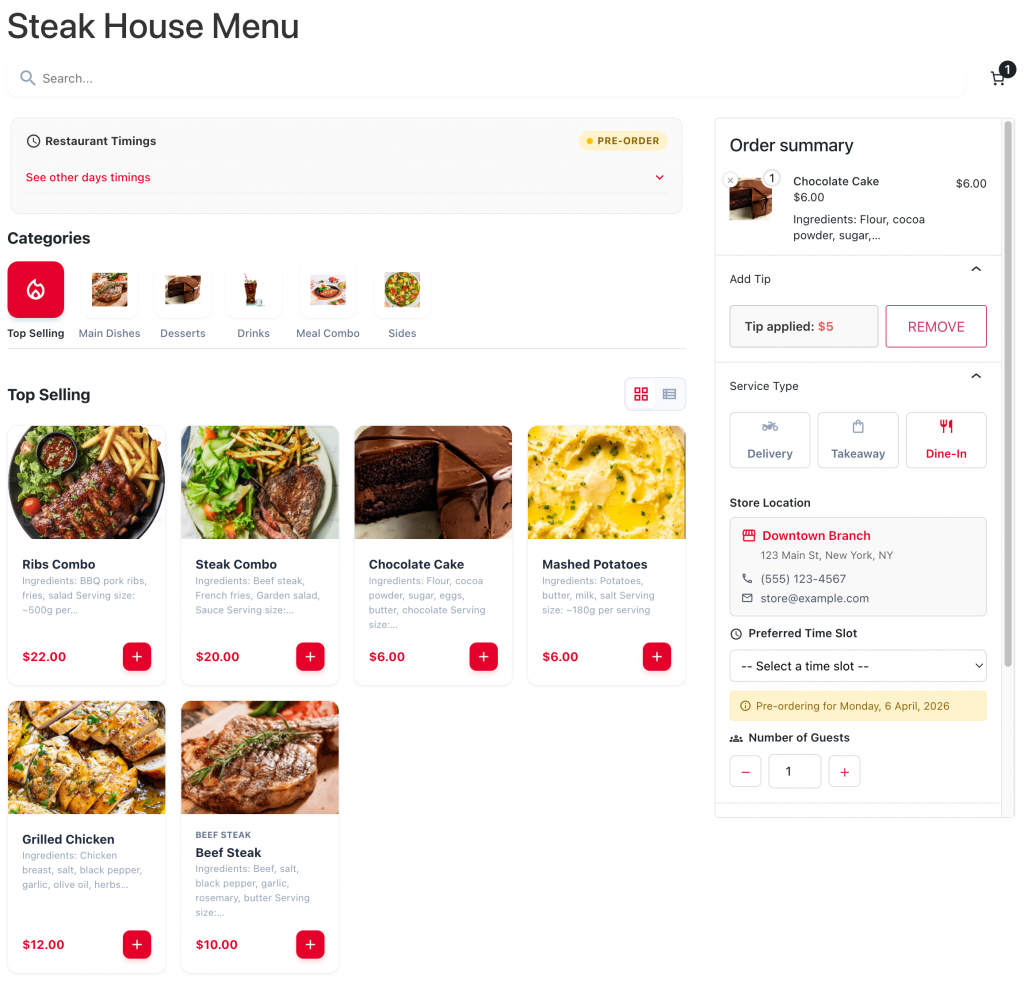
YeeMenu – Restaurant Menu for WooCommerce is a plugin designed to transform a standard WooCommerce store into a fast, user-friendly food ordering system.
Instead of the default product-based shopping experience, YeeMenu provides a menu-style interface optimized for restaurants, cafes, and food delivery businesses.
🎯 Purpose:
WooCommerce by default is not optimized for food ordering because:
- Customers must open each product individually
- Page reloads slow down the ordering process
- The experience is not intuitive for quick decisions
👉 YeeMenu solves this by:
- Displaying all items in a menu layout
- Allowing instant add-to-cart
- Reducing friction in the ordering process
1. Installation
- Download the yeemenu.zip file.
- Go to WordPress Admin > Plugins > Add New.
- Upload the plugin ZIP file and click Install Now.
- Activate the plugin.
- You won’t see a ‘YeeMenu’ tab on your sidebar immediately. To make the menu appear, simply create a new Page and paste the shortcode [yeemenu] into the editor. Hit Publish, and all your WooCommerce categories and products are now beautifully organized in a restaurant layout.
Restaurant Menu for WooCommerce enables you to automatically add linked products to the cart, synchronize stock and quantities, manage pricing, and control flexible display positions within your store.
2. Setup and Configuration
To begin customizing your digital menu, navigate to: WooCommerce > Settings > Restaurant Menu.
The configuration interface is divided into six comprehensive sections to give you full control over your food ordering ecosystem:
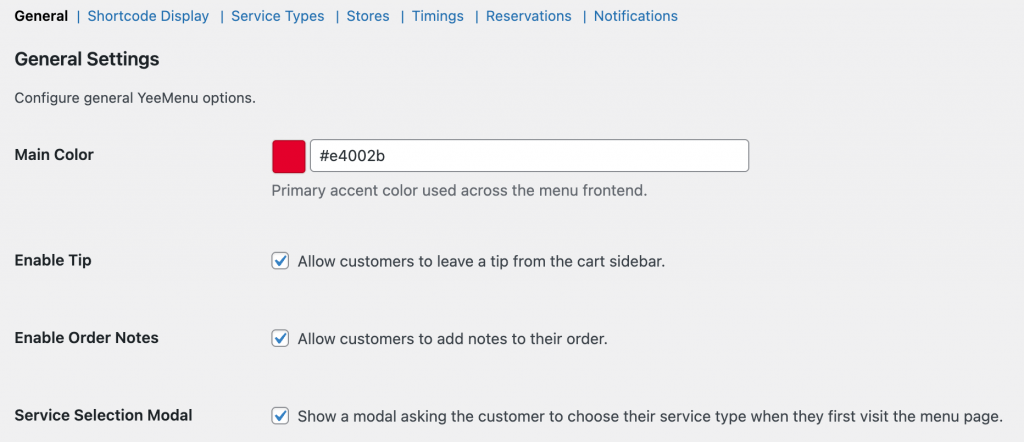
2.1 General Settings
This section controls the core functionality and interactive elements of your menu.
- Main Color: Define the primary theme color used across the frontend (buttons, icons, and highlights).
- Customer Interaction: Enable/Disable the Tip system, Order Notes (for special cooking instructions), and the Service Selection Modal (which asks customers to choose Delivery/Takeaway upon entry).
2.2 Shortcode & Display
Manage how your products and categories appear to the customer.
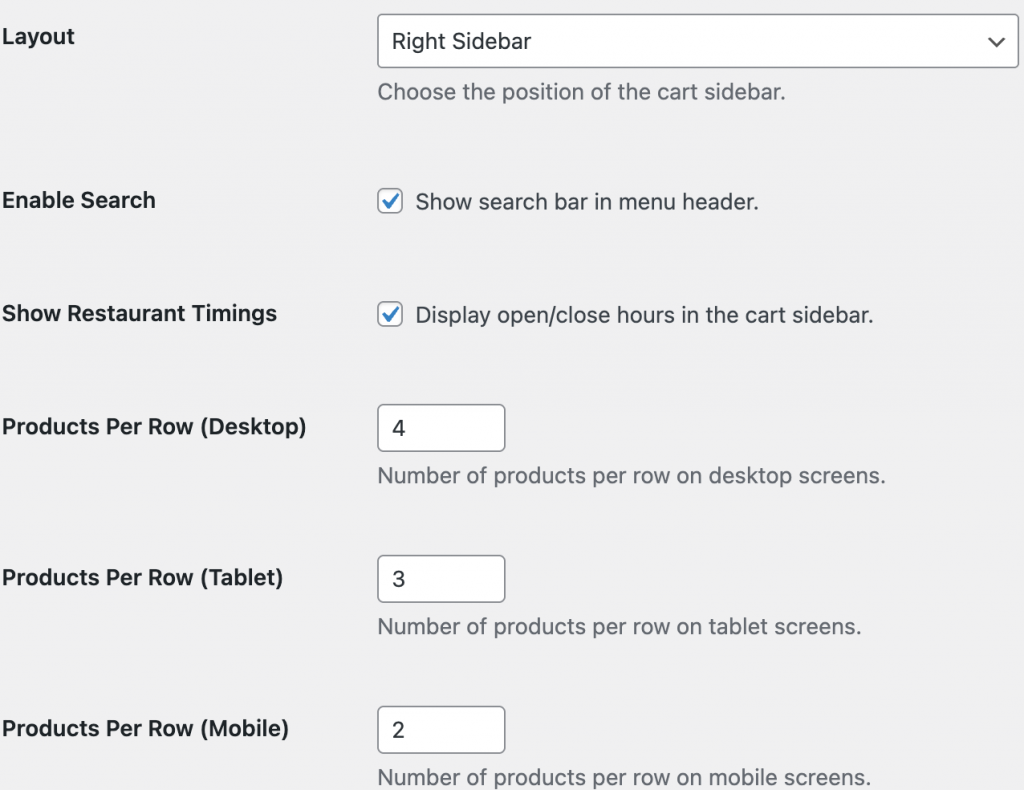
- Layout Selection:
- Sidebar Right (Default): The classic POS/App look. Products on the left, mini cart on the right.
- 3 Column: Categories, Products, and Mini Cart are displayed side-by-side in 3 columns.
- Full Width (Top): Disables the sticky sidebar cart entirely. Ideal if your theme already features a prominent sticky cart widget.
- Search & Filters: Toggle the Instant Search Bar and category filters to help customers find dishes faster.
- Responsive Grid: Customize the number of Products Per Row specifically for Desktop, Tablet, and Mobile screens.
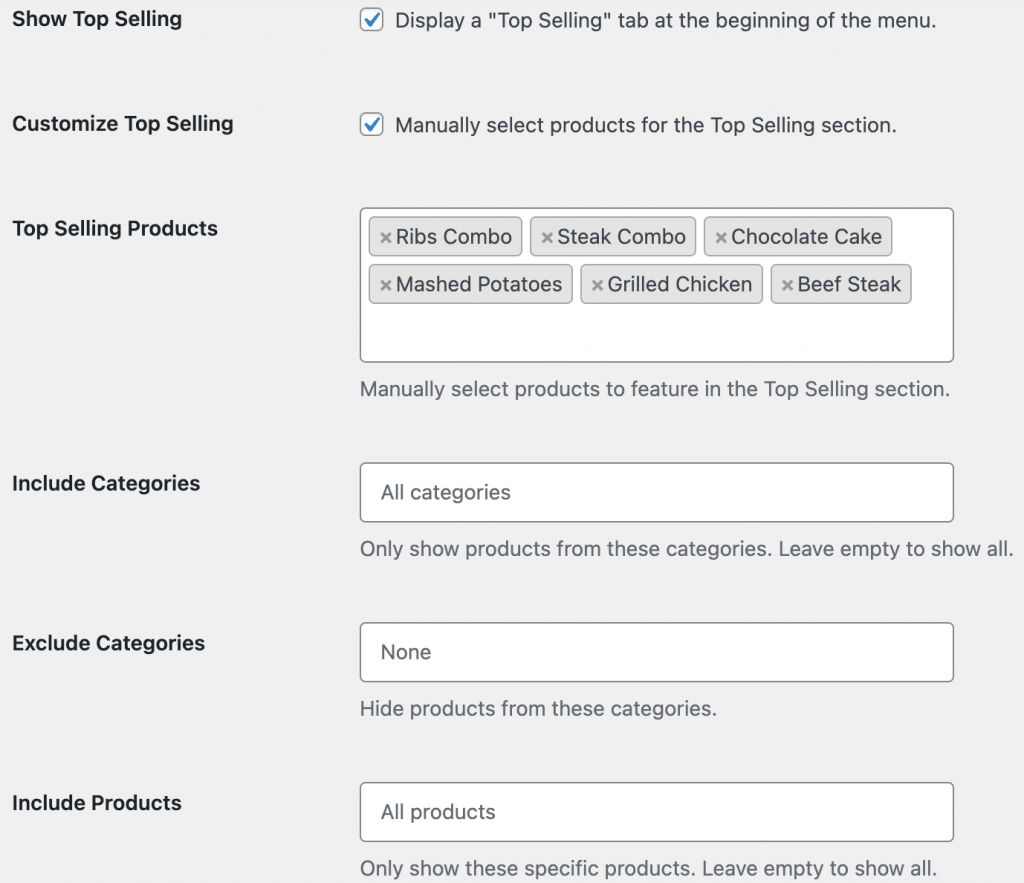
- Top Selling Section: Enable a dedicated tab for your best-sellers. You can let the system decide or manually select “Signature Dishes” to display at the top of the menu.
- Visibility Control: Include or Exclude specific Categories/Products to create curated menus for different pages.
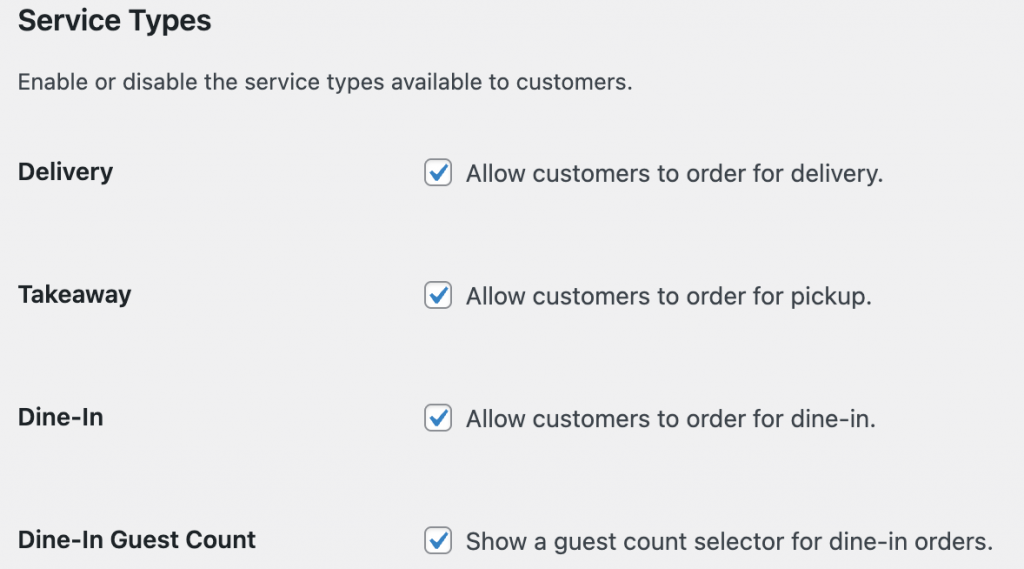
2.3 Stores & Service Types
Define how and where your customers can receive their food.
- Service Methods: Individually toggle Delivery, Takeaway, and Dine-In.
- Delivery: Standard WooCommerce shipping functionality applies.
- Takeaway & Dine-In: If enabled, you can add multiple Store Branches. The user will be required to select their preferred branch before adding items to the cart.
- Dine-In Features: Enable Guest Count selectors to know exactly how many people are coming for a table.
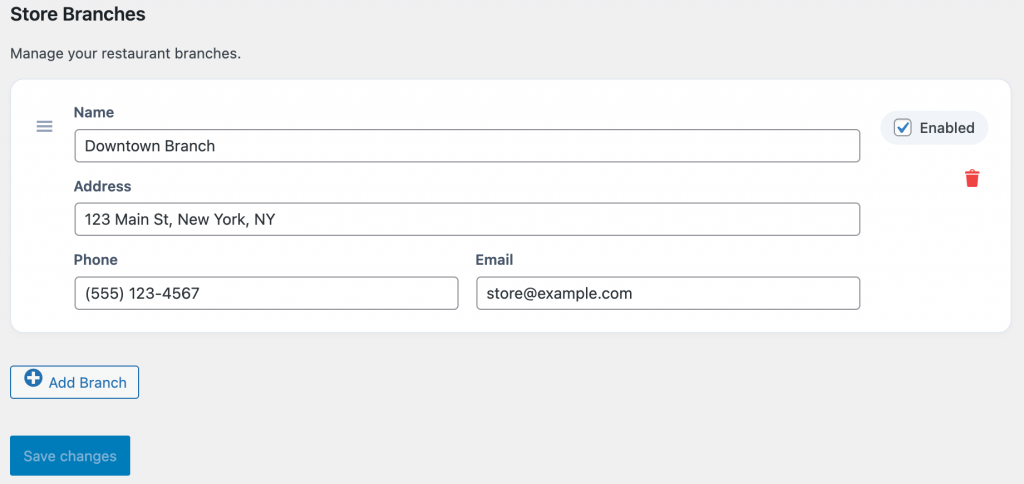
2.4 Store Management
Add your physical restaurant branch details, including Name, Address, and Phone Number for customer reference.
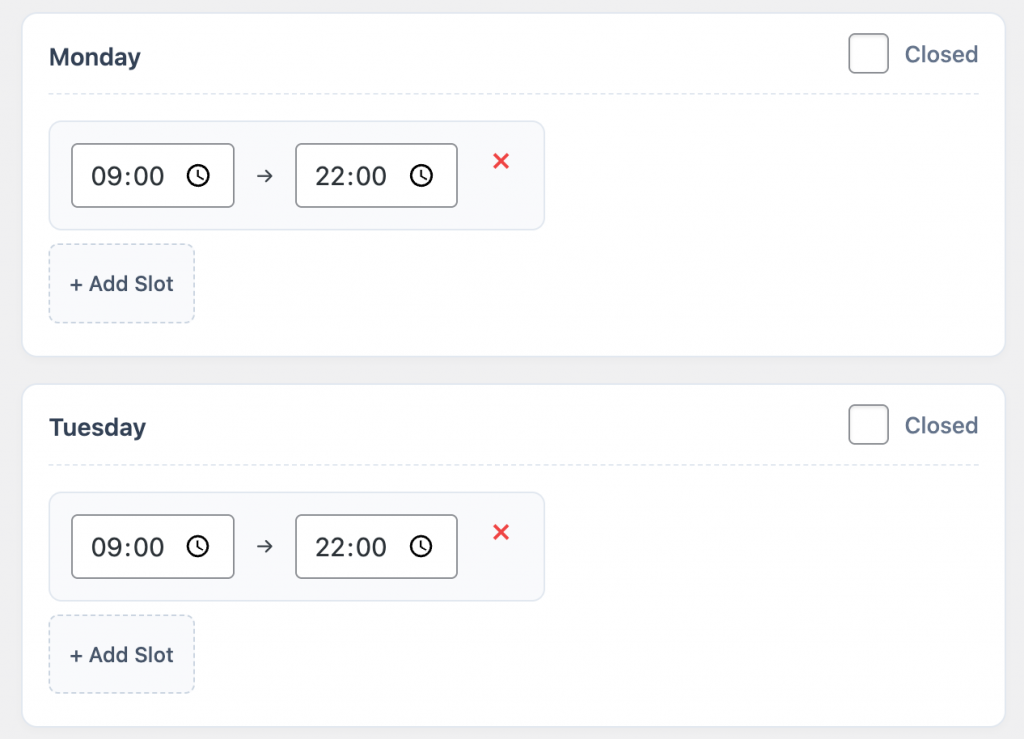
2.5 Restaurant Timings
Keep your operations organized with smart scheduling.
- Opening Hours: Set unique daily hours for your restaurant.
- Mark as Closed: Instantly shut down accepting orders for a specific day of the week.
- Time-Slot Preferences: Configure pre-order slots to prevent your kitchen from being overwhelmed during peak hours.
- Pre-Ordering: Allow customers to schedule orders up to 7 days in advance if you are currently closed.

2.6 Table Reservations
Automate your dining room management.
- Capacity Limits: Set the Max Party Size to ensure you don’t overbook your space.
- Advance Booking: Define how many days in advance a customer can reserve a table.
- Auto-Confirm: Enable this to instantly confirm reservations, or leave it off for manual staff approval.

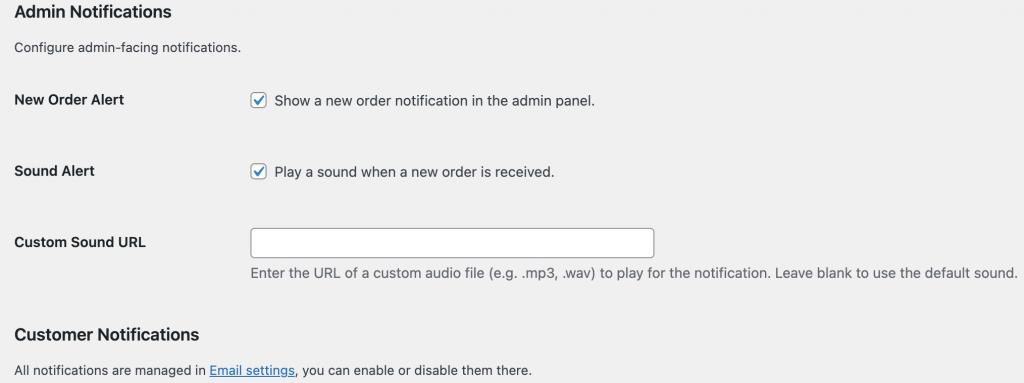
2.7 Admin Notifications
Stay updated on every order with real-time alerts.
- New Order Alerts: Visual notifications within the WordPress admin panel.
- Sound Alerts: Enable audible notifications when a new order arrives.
- Custom Sound URL: Upload your own
.mp3or.wavfile (e.g., a “Ding” or a bell) to make sure the kitchen staff hears every incoming order. - System Notifications: Manage daily sales reports and system status updates to keep the business running smoothly.
3. Shortcodes – Display
The primary way to display the menu is via the [yeemenu] shortcode.
| Attribute | Example | Description |
|---|---|---|
category | [yeemenu category="id"] | Overrides global settings to only display the specified category slug. |
limit | [yeemenu limit="20"] | Loads 20 products per category before requiring pagination. Default is 10. |
layout | [yeemenu layout="full"] | Overrides the global layout for a specific page (left, right, full). |
columns | [yeemenu columns="3"] | Sets the number of product columns to display per row (e.g., 2, 3, 4). |
enable_search | [yeemenu enable_search="yes"] | Toggles the live search bar visibility at the top of the menu (yes/no). |
show_timings | [yeemenu show_timings="no"] | Shows or hides the restaurant’s daily opening hours on the menu page. |
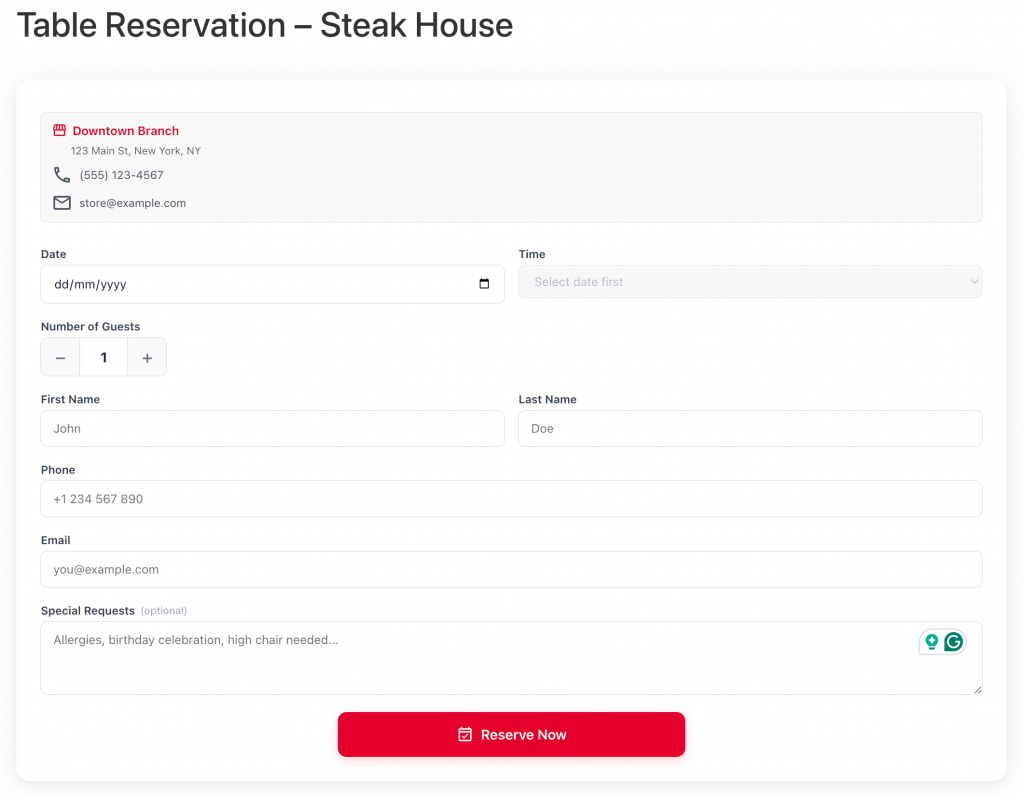
4. Table Reservations
The Restaurant Menu Table Reservation system allows customers to book a table directly from your website. It integrates seamlessly with WooCommerce orders, providing a familiar interface for both store owners and customers.
Setup & Shortcode
To display the reservation form on any page or post, use the following shortcode:
[yeemenu_reservation]
How to implement:
- Create a new page (e.g., “Book a Table”).
- Paste the [yeemenu_reservation] shortcode into the content editor.
- Publish the page.
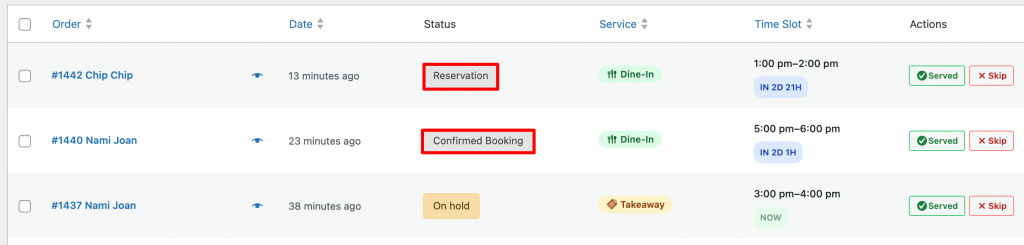
Reservation Statuses:
Introduces two specific order statuses to distinguish table bookings from regular product orders:
- Reservation (Pending): The initial state when a customer submits a booking request. Admin approval is required.
- Confirmed Booking: The state after an administrator approves the reservation.
Administrators can manually change these statuses within the standard WooCommerce > Orders screen.
Email Notifications
Keep everyone informed with automated emails. Configuration for these emails is located in WooCommerce > Settings > Emails.
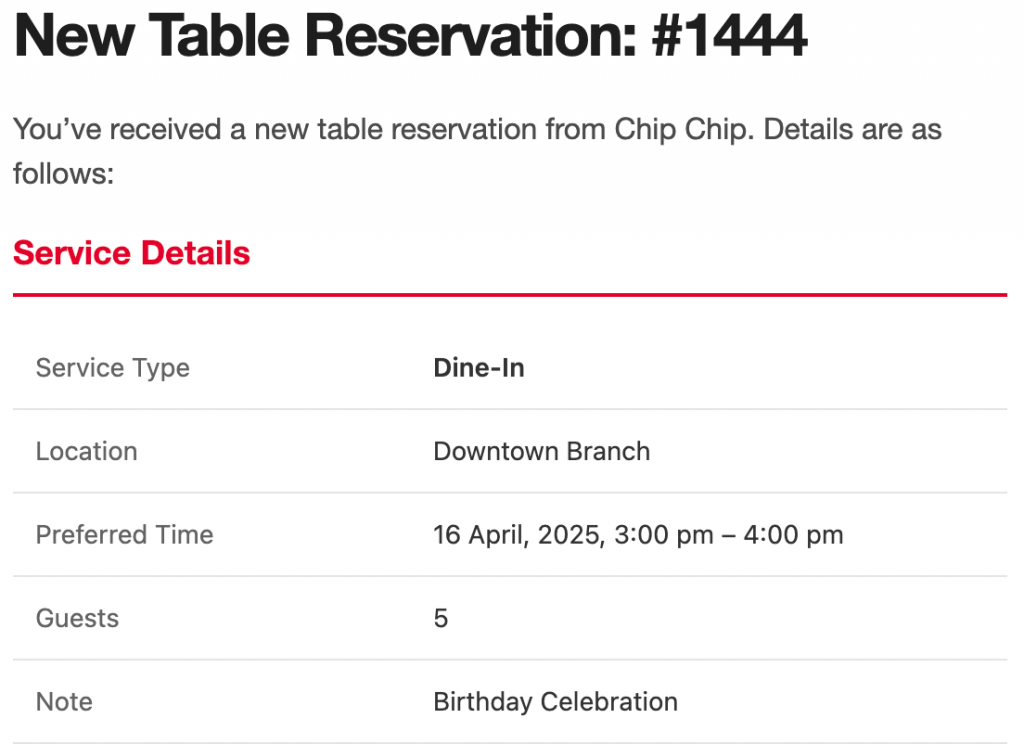
1. New Table Reservation (Admin)
Sent to the restaurant manager when a new request is received. You can configure multiple recipients using comma-separated email addresses.
2. Reservation Confirmed (Customer)
Sent to the customer the moment their reservation status is changed to “Confirmed Booking” by the admin.
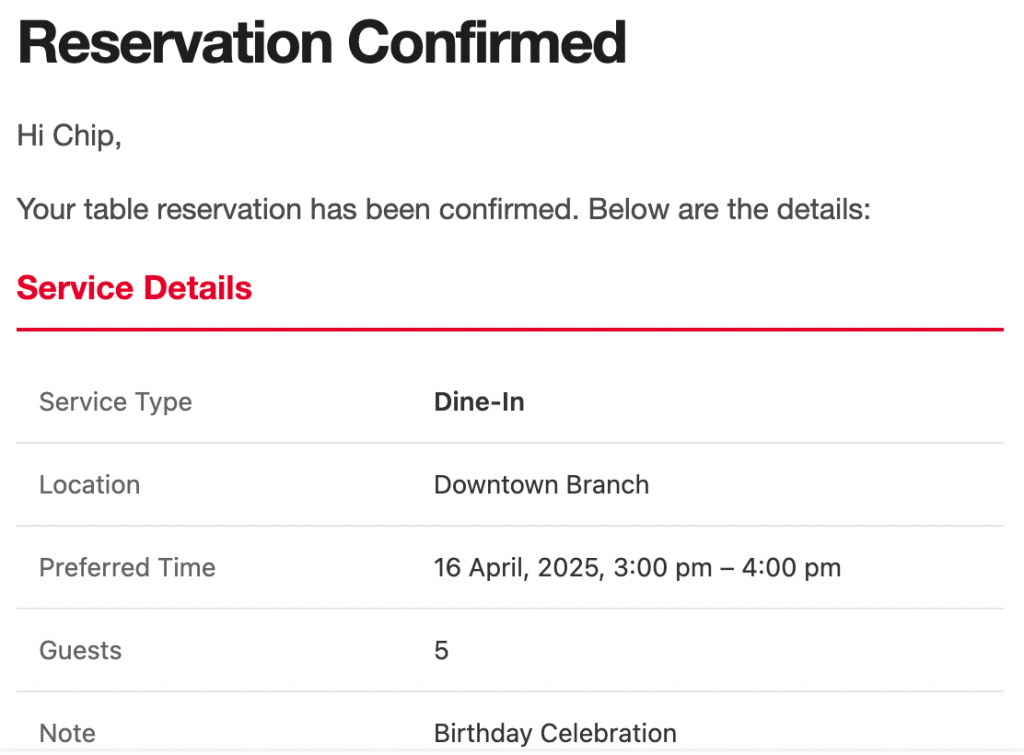
Auto-Confirmation
If you prefer to accept all bookings automatically without manual approval, you can enable this in the settings:
- Go to WooCommerce > Settings > Table Reservations.
- Check the option “Automatically confirm reservations”.
- Save changes.
When enabled, all new reservations will jump directly to the Confirmed Booking status and trigger the customer notification immediately.
6. Order Management for Chefs & Owners
Efficiently manage Delivery, Takeaway, and Dine-In orders with a streamlined interface.
YeeMenu enhances the default WooCommerce Order list by adding critical restaurant-specific metadata, advanced filtering options, and quick-action buttons designed for busy kitchen operations
All enhancements are visible directly under WooCommerce > Orders
Chef View
The Chef View is a one-click quick filter designed to help the kitchen focus on what needs to be prepared now.
When activated, the Chef View performs the following actions:
- Filters by Date: Only shows orders for Today.
- Filters by Status: Only shows active orders (Pending, Processing, On-hold, Reservation Confirmed).
- Sorts by Time: Automatically sorts orders chronologically by their Time Slot.
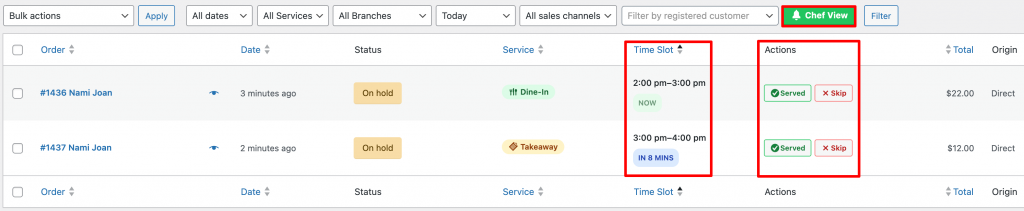
Once the meal is ready, just click the ‘Served‘ button. This completes the order, notifies the customer immediately, and hides it from the dashboard to keep the kitchen focused on the next task. No clutter, no confusion.
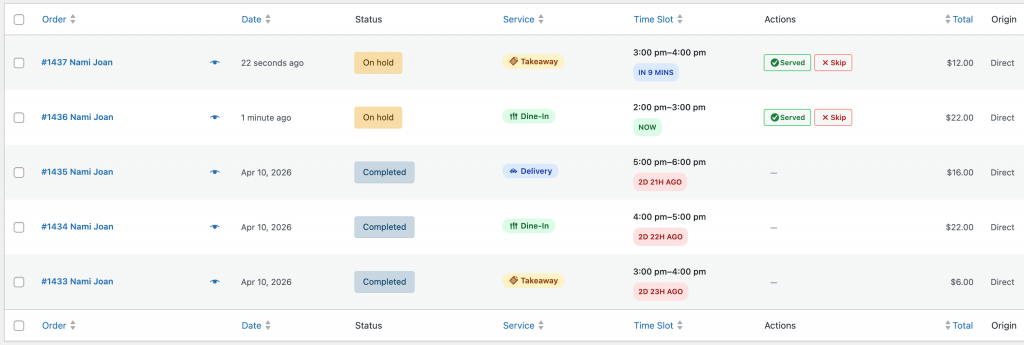
7. Custom Data Columns
New columns have been added to the orders table to provide instant information at a glance:
| Column | Description |
|---|---|
| Service | Displays the service type: Delivery, Takeaway, or Dine-In. |
| Time Slot | Shows the appointment time and a real-time countdown (e.g., “In 15 mins”, “Now”, “10 mins ago”). |
| Branch | Identifies which restaurant location the order belongs to (Hidden by default). |
| Guests | Shows the number of people (for Dine-In/Reservations) (Hidden by default). |
Quick Actions
Managers and Chefs can update order statuses with a single click in the Actions column:
- Served: Instantly marks the order as Completed and removes it from the active prep list.
- Skip: Marks the order as Cancelled (useful for “No-show” reservations) and removes it from the list.
8. Advanced Filtering
Filter your orders by multiple criteria to find exactly what you need:
- By Time: Filter for Today, Tomorrow, or pick a Custom Date.
- By Service: View only Delivery, Takeaway, or Dine-In orders.
- By Branch: Focus on orders for a specific restaurant location.